Access to Rapha's systems using Auth0 & API Gateway
Overview
Spike to evaluate the Authentication & Authorisation for 3rd parties access, with Auth0 as the provider.
Showing by example
The following example diagram illustrates the access (Authentication + Authorisation) of two different vendors (DigitalGenius / Dixa) to Rapha's system exposed in Hybris.
As described in the flow steps, there are basically 3 stages:
- Vendor exhanges their credentials to adquire a temporary token (containing the scopes assigned) from the Auth provider (Auth0). Steps 1 - 2
- Vendor sends a request to the service endpoint exposed by the Middleware, including the previous token as an Authorisation header. Step 3
- Endpoint authorises or denies accees based on the validity of the token and the scopes included. Steps 4 - 5

Step-by-step configuration
API Endpoint
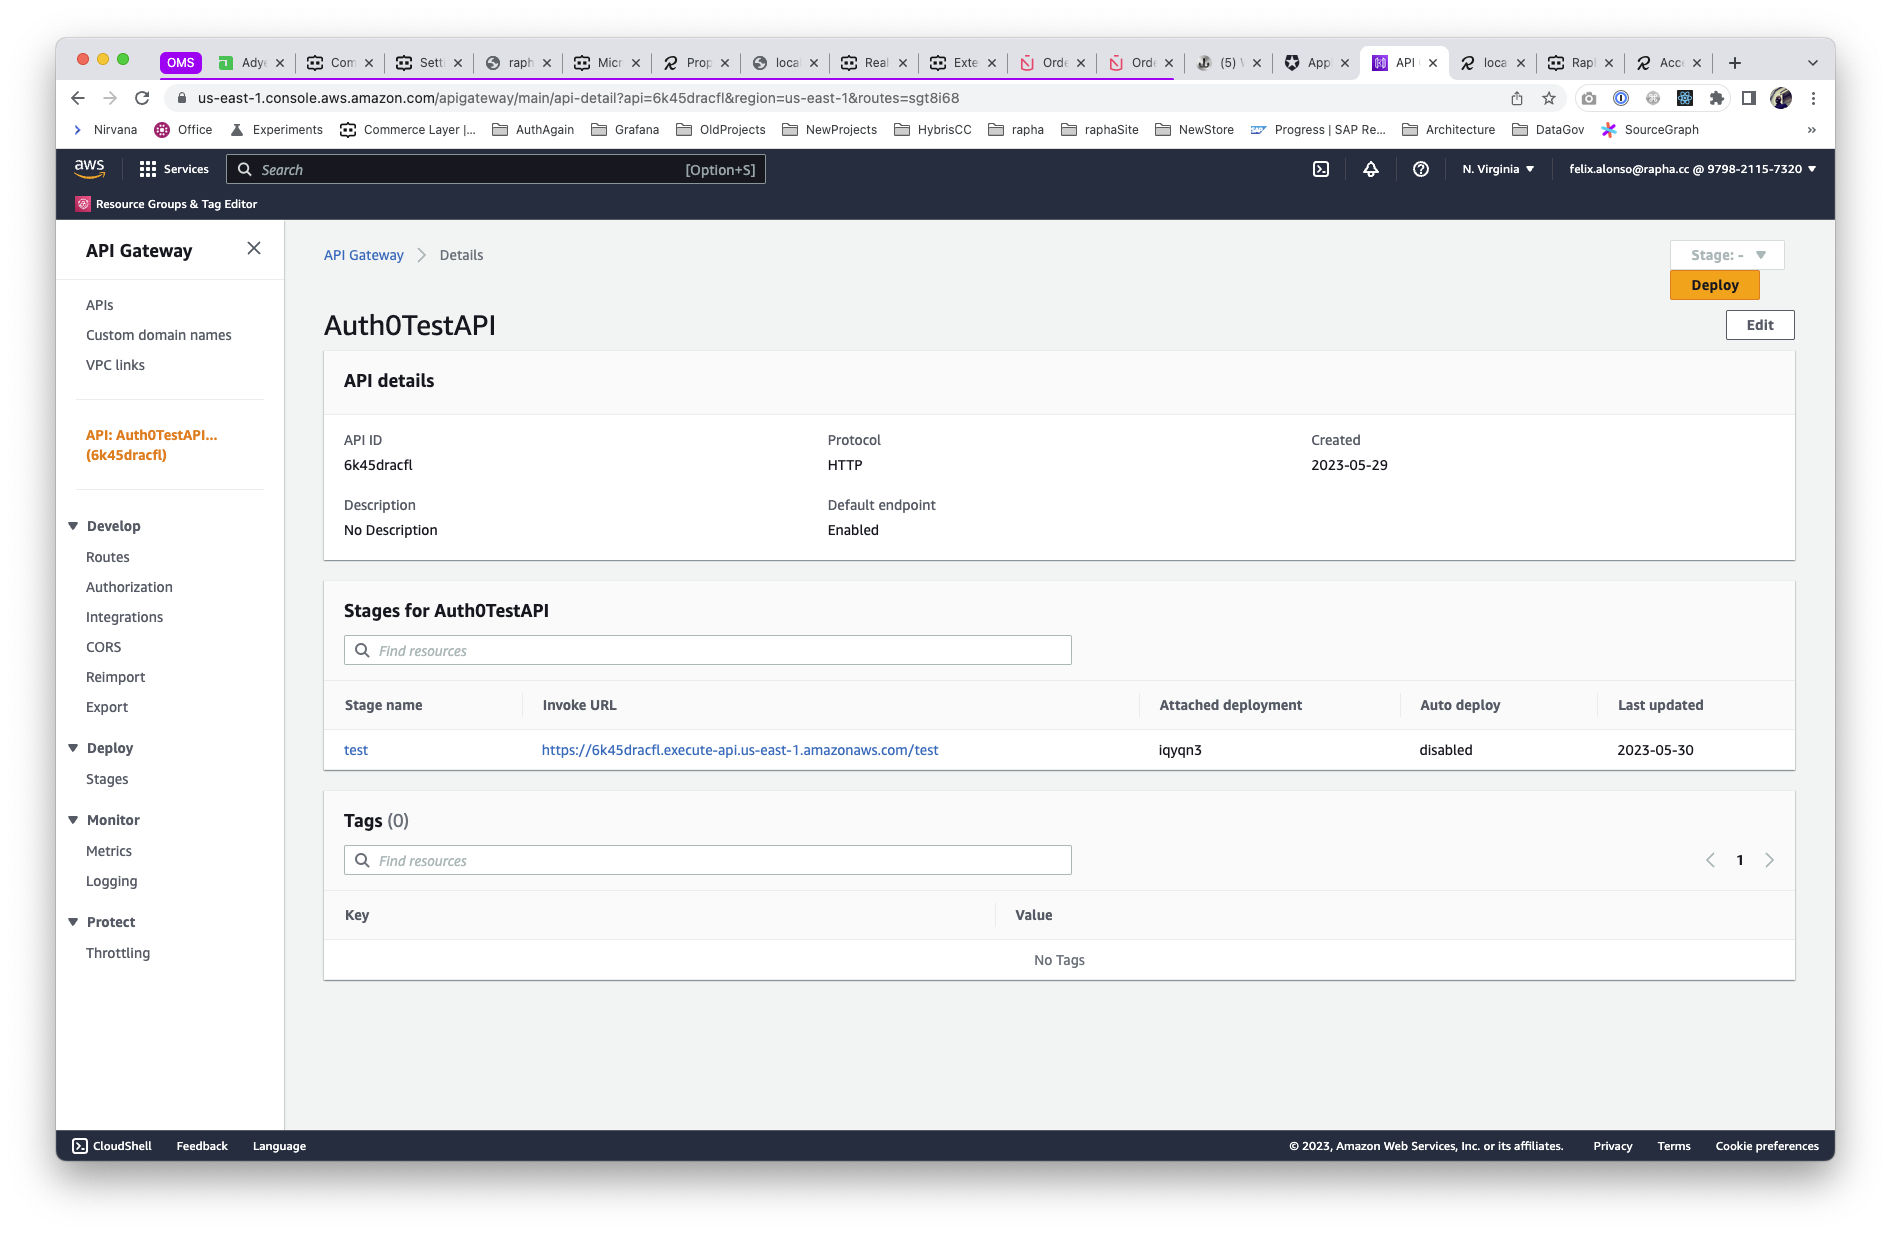
First, we will create the API endpoint in AWS API Gateway, providing access to the current eCommerce system, Hybris. In the example, we will enable the access to customer details via a proxy GET. (Note, the following implements a HTTP API)
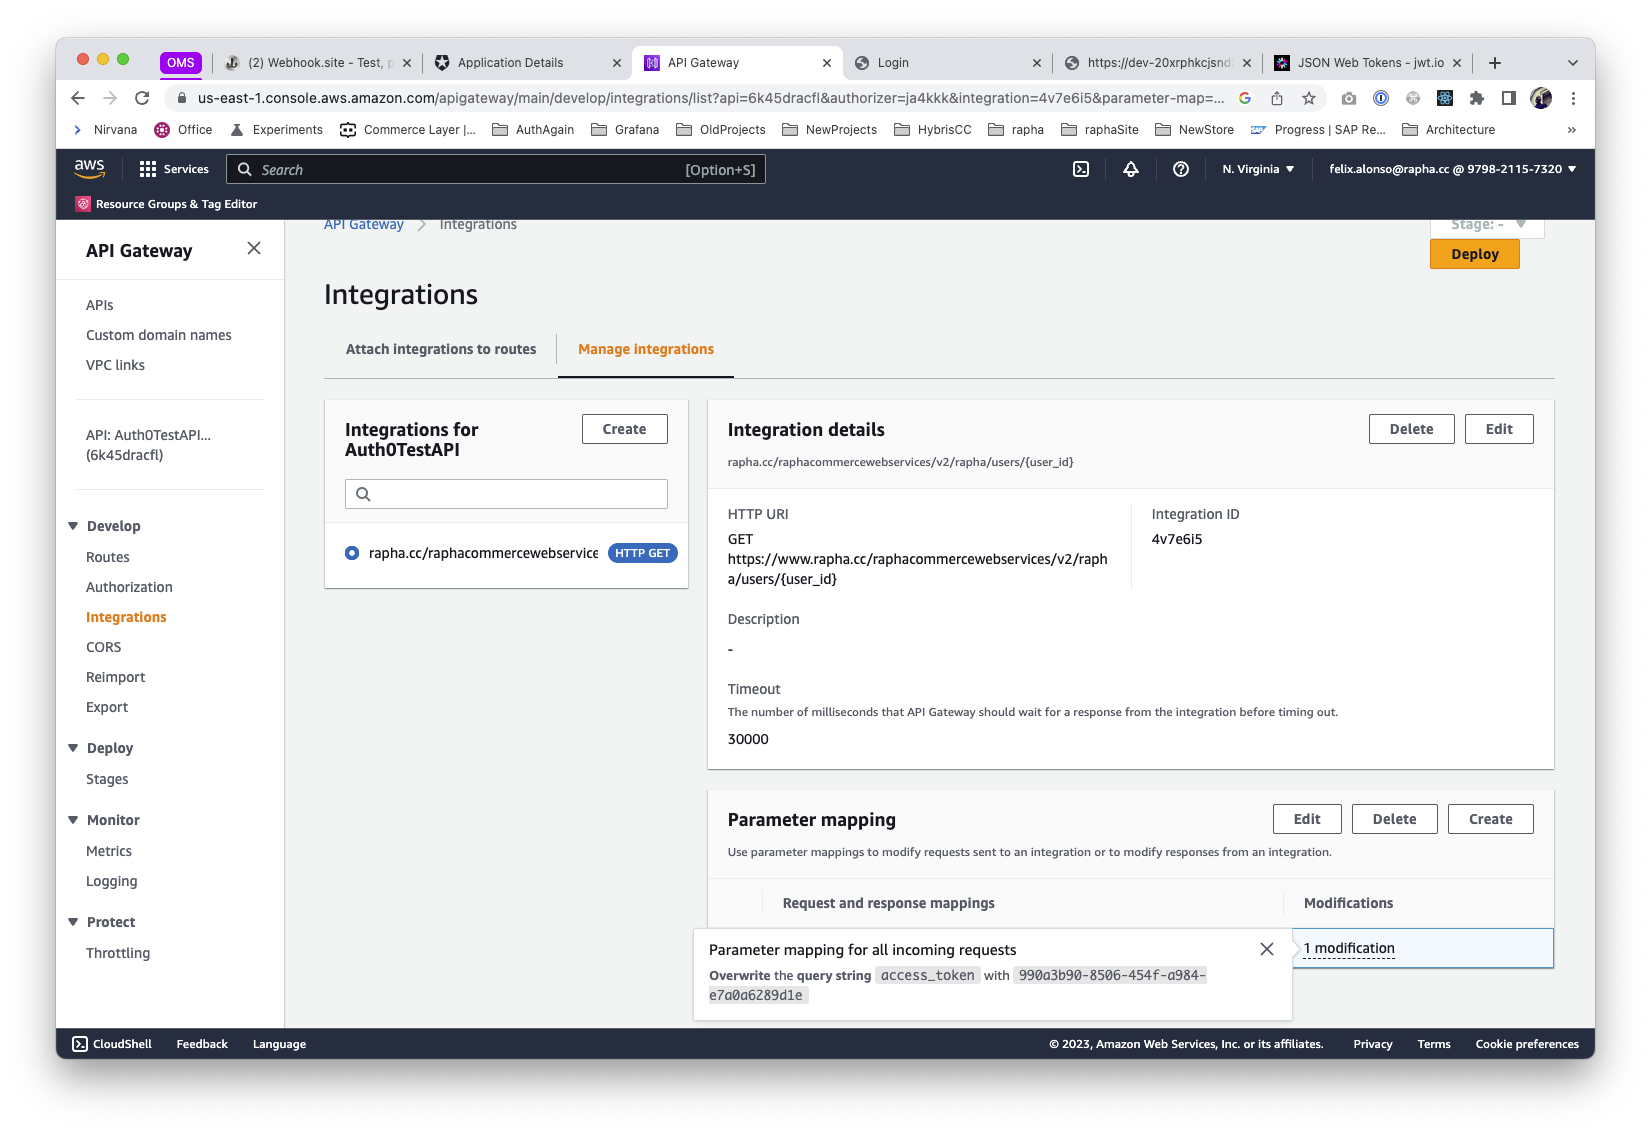
We also defined a parameter mapping to include the OAuth validation in order to get access to Hybris itself via API. Please notice that this is not production-ready, where we should map from a secret variable.
Auth0 Configuration
API
Switching to the Auth provider (Auth0), first thing is to create & configure a new API.
Used here the indentifier based on the Invoke URL parameter configured on the API Endpoint
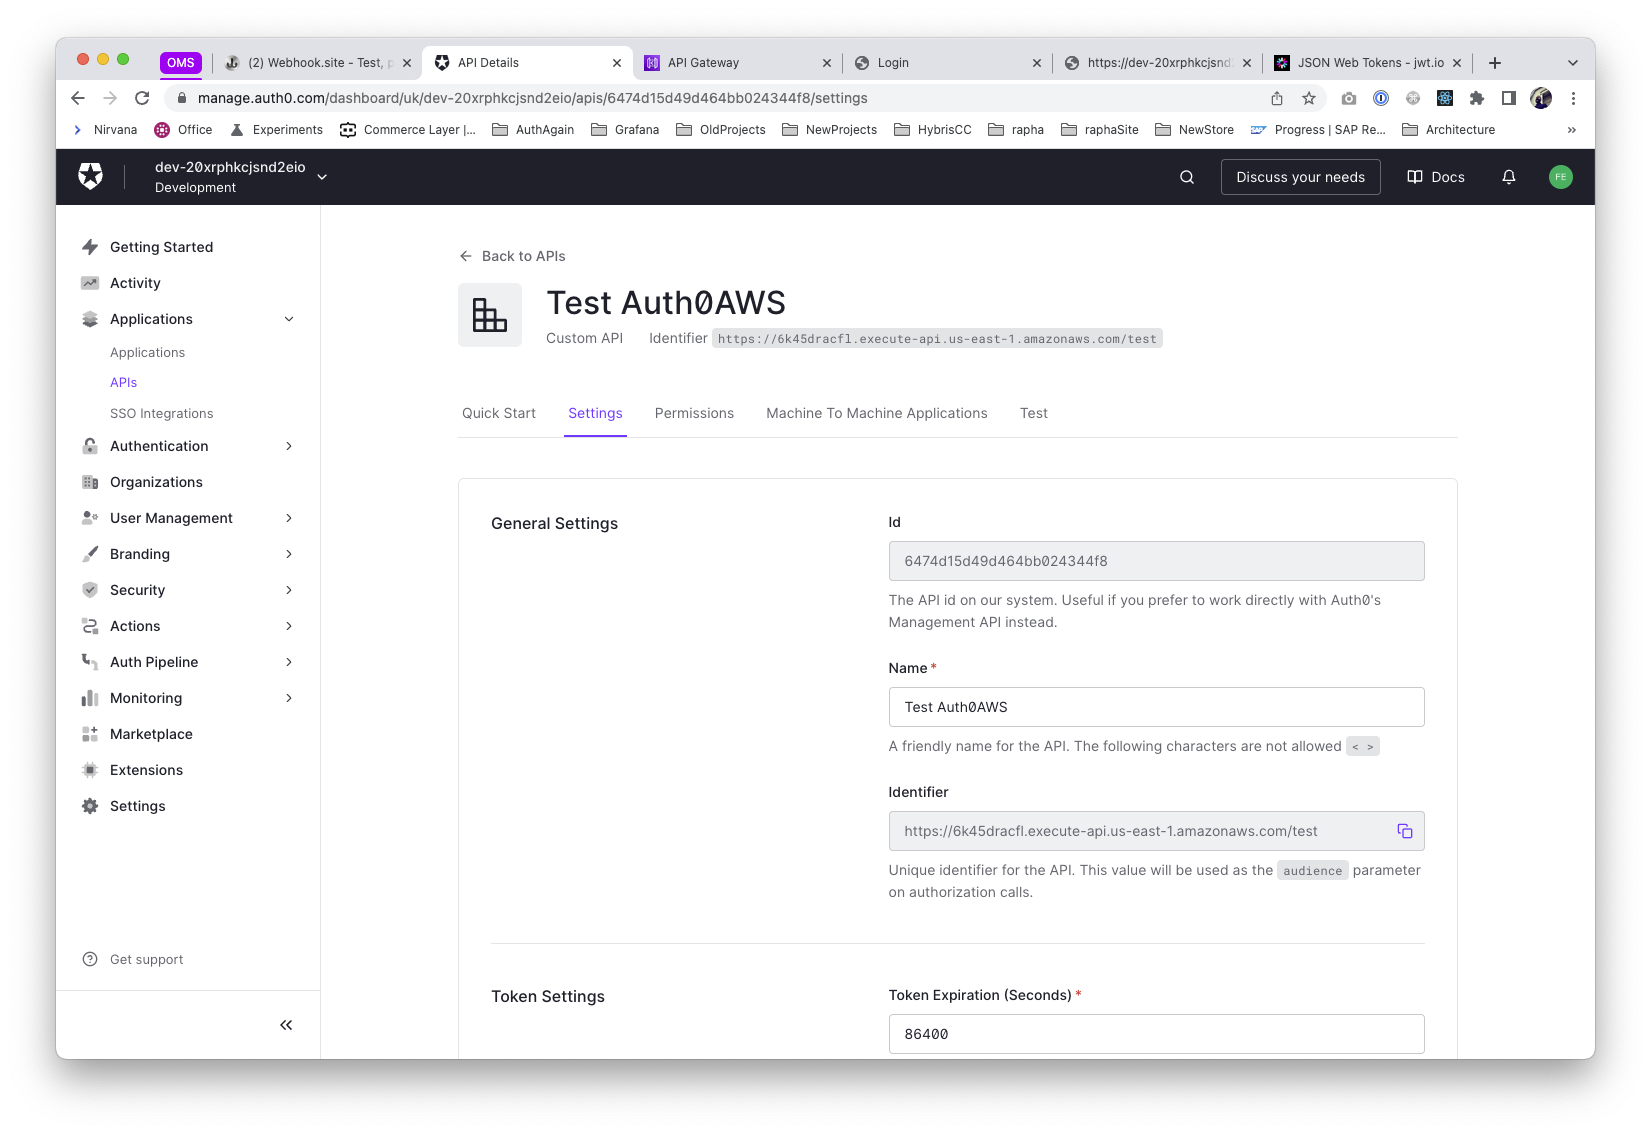
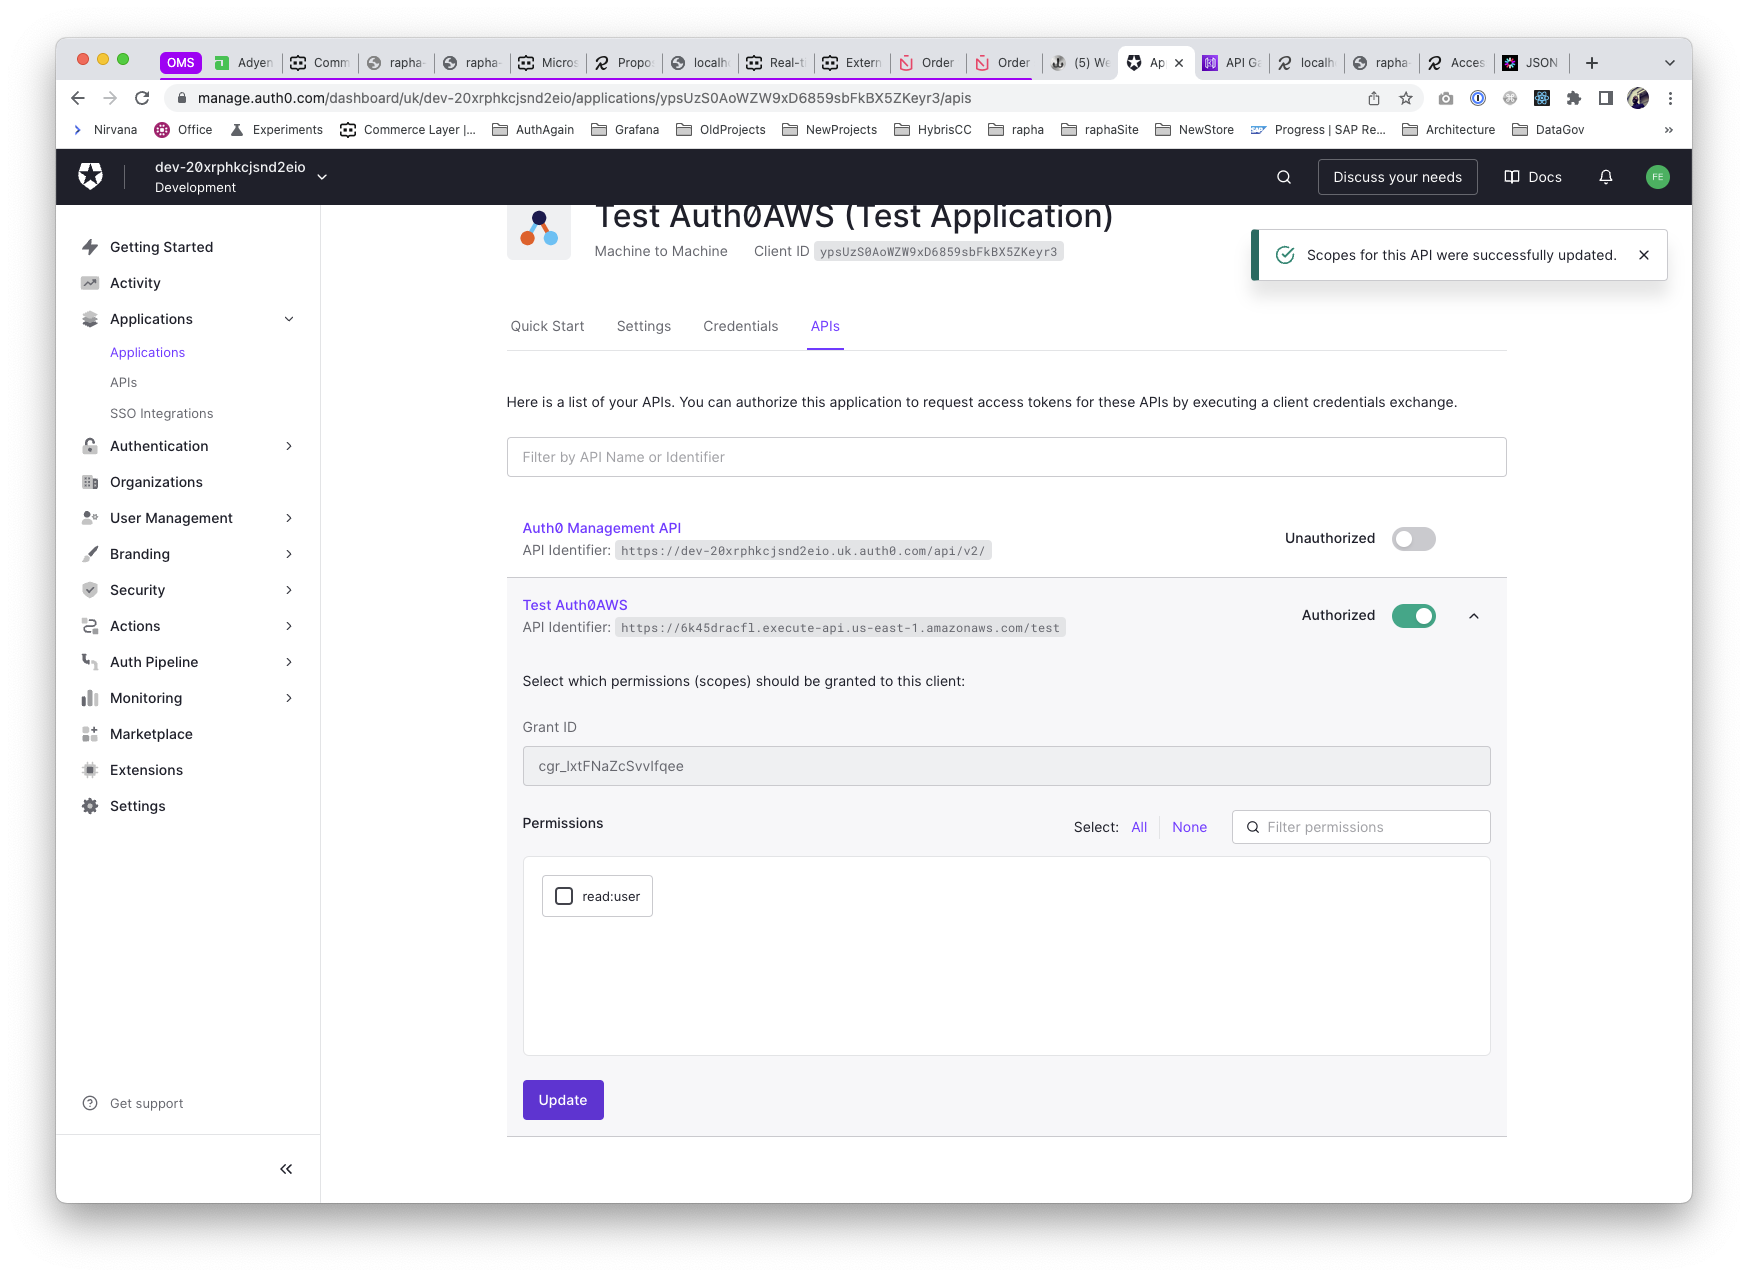
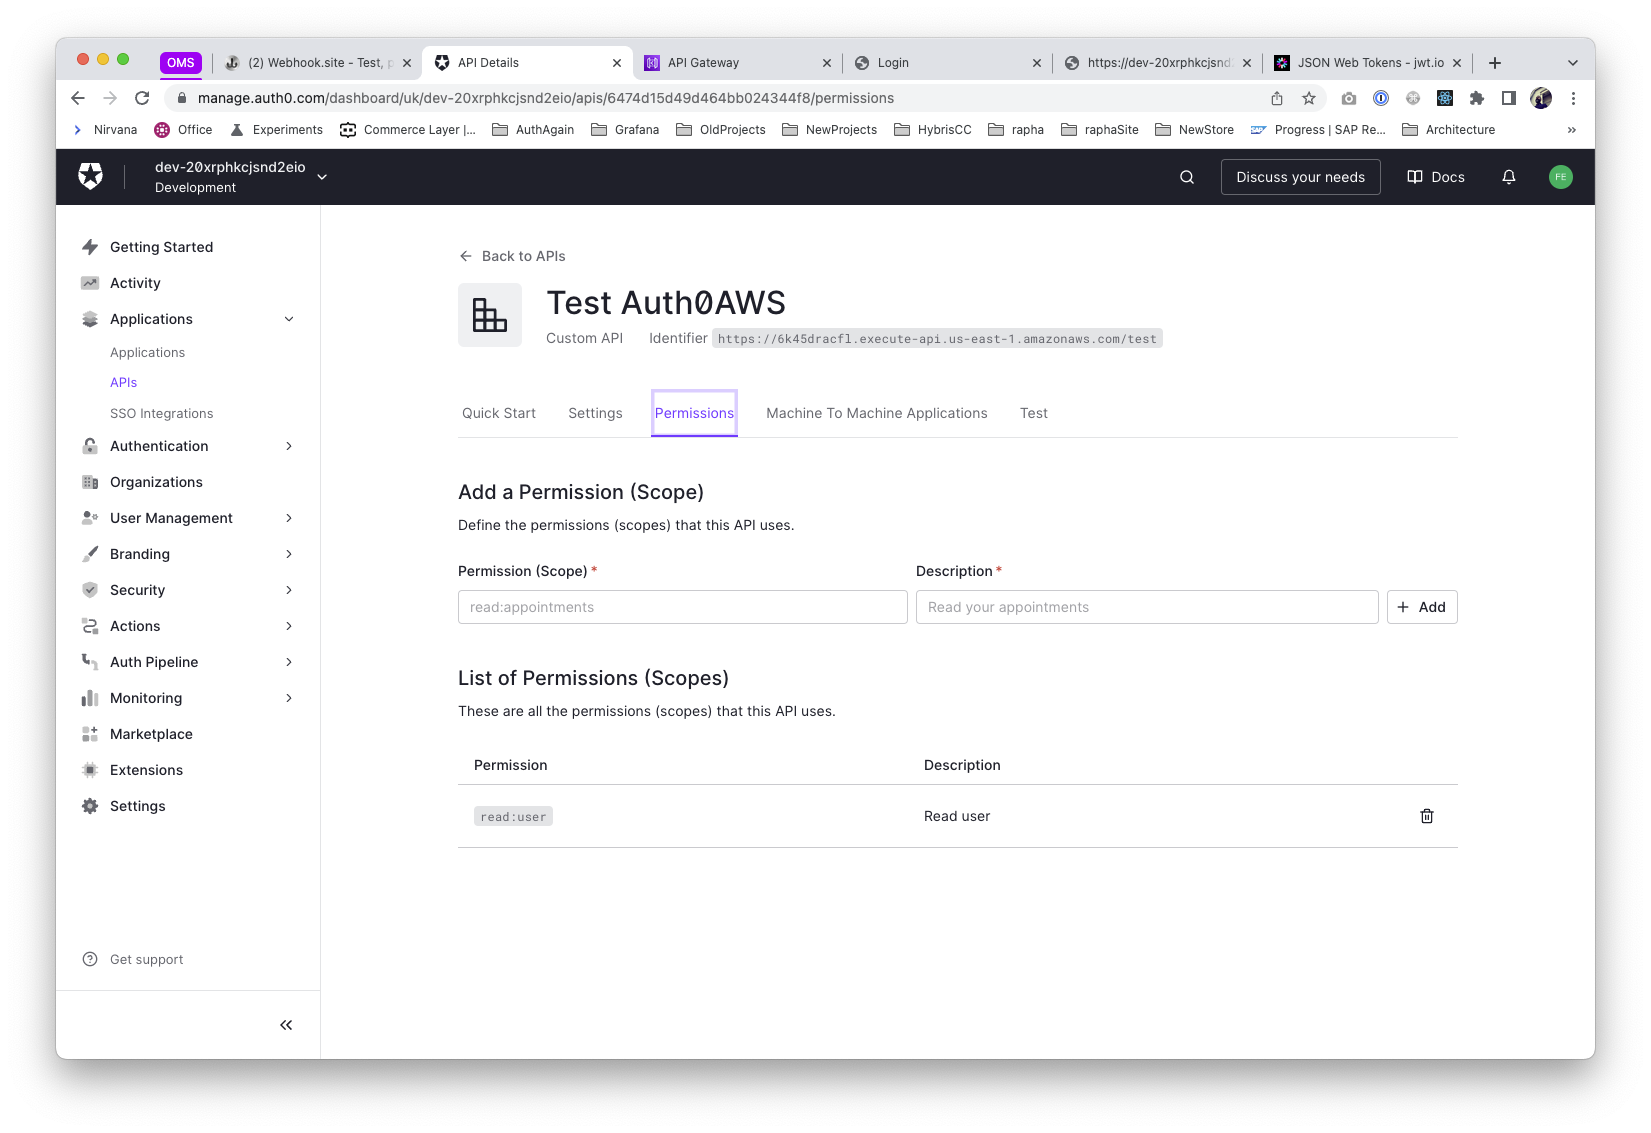
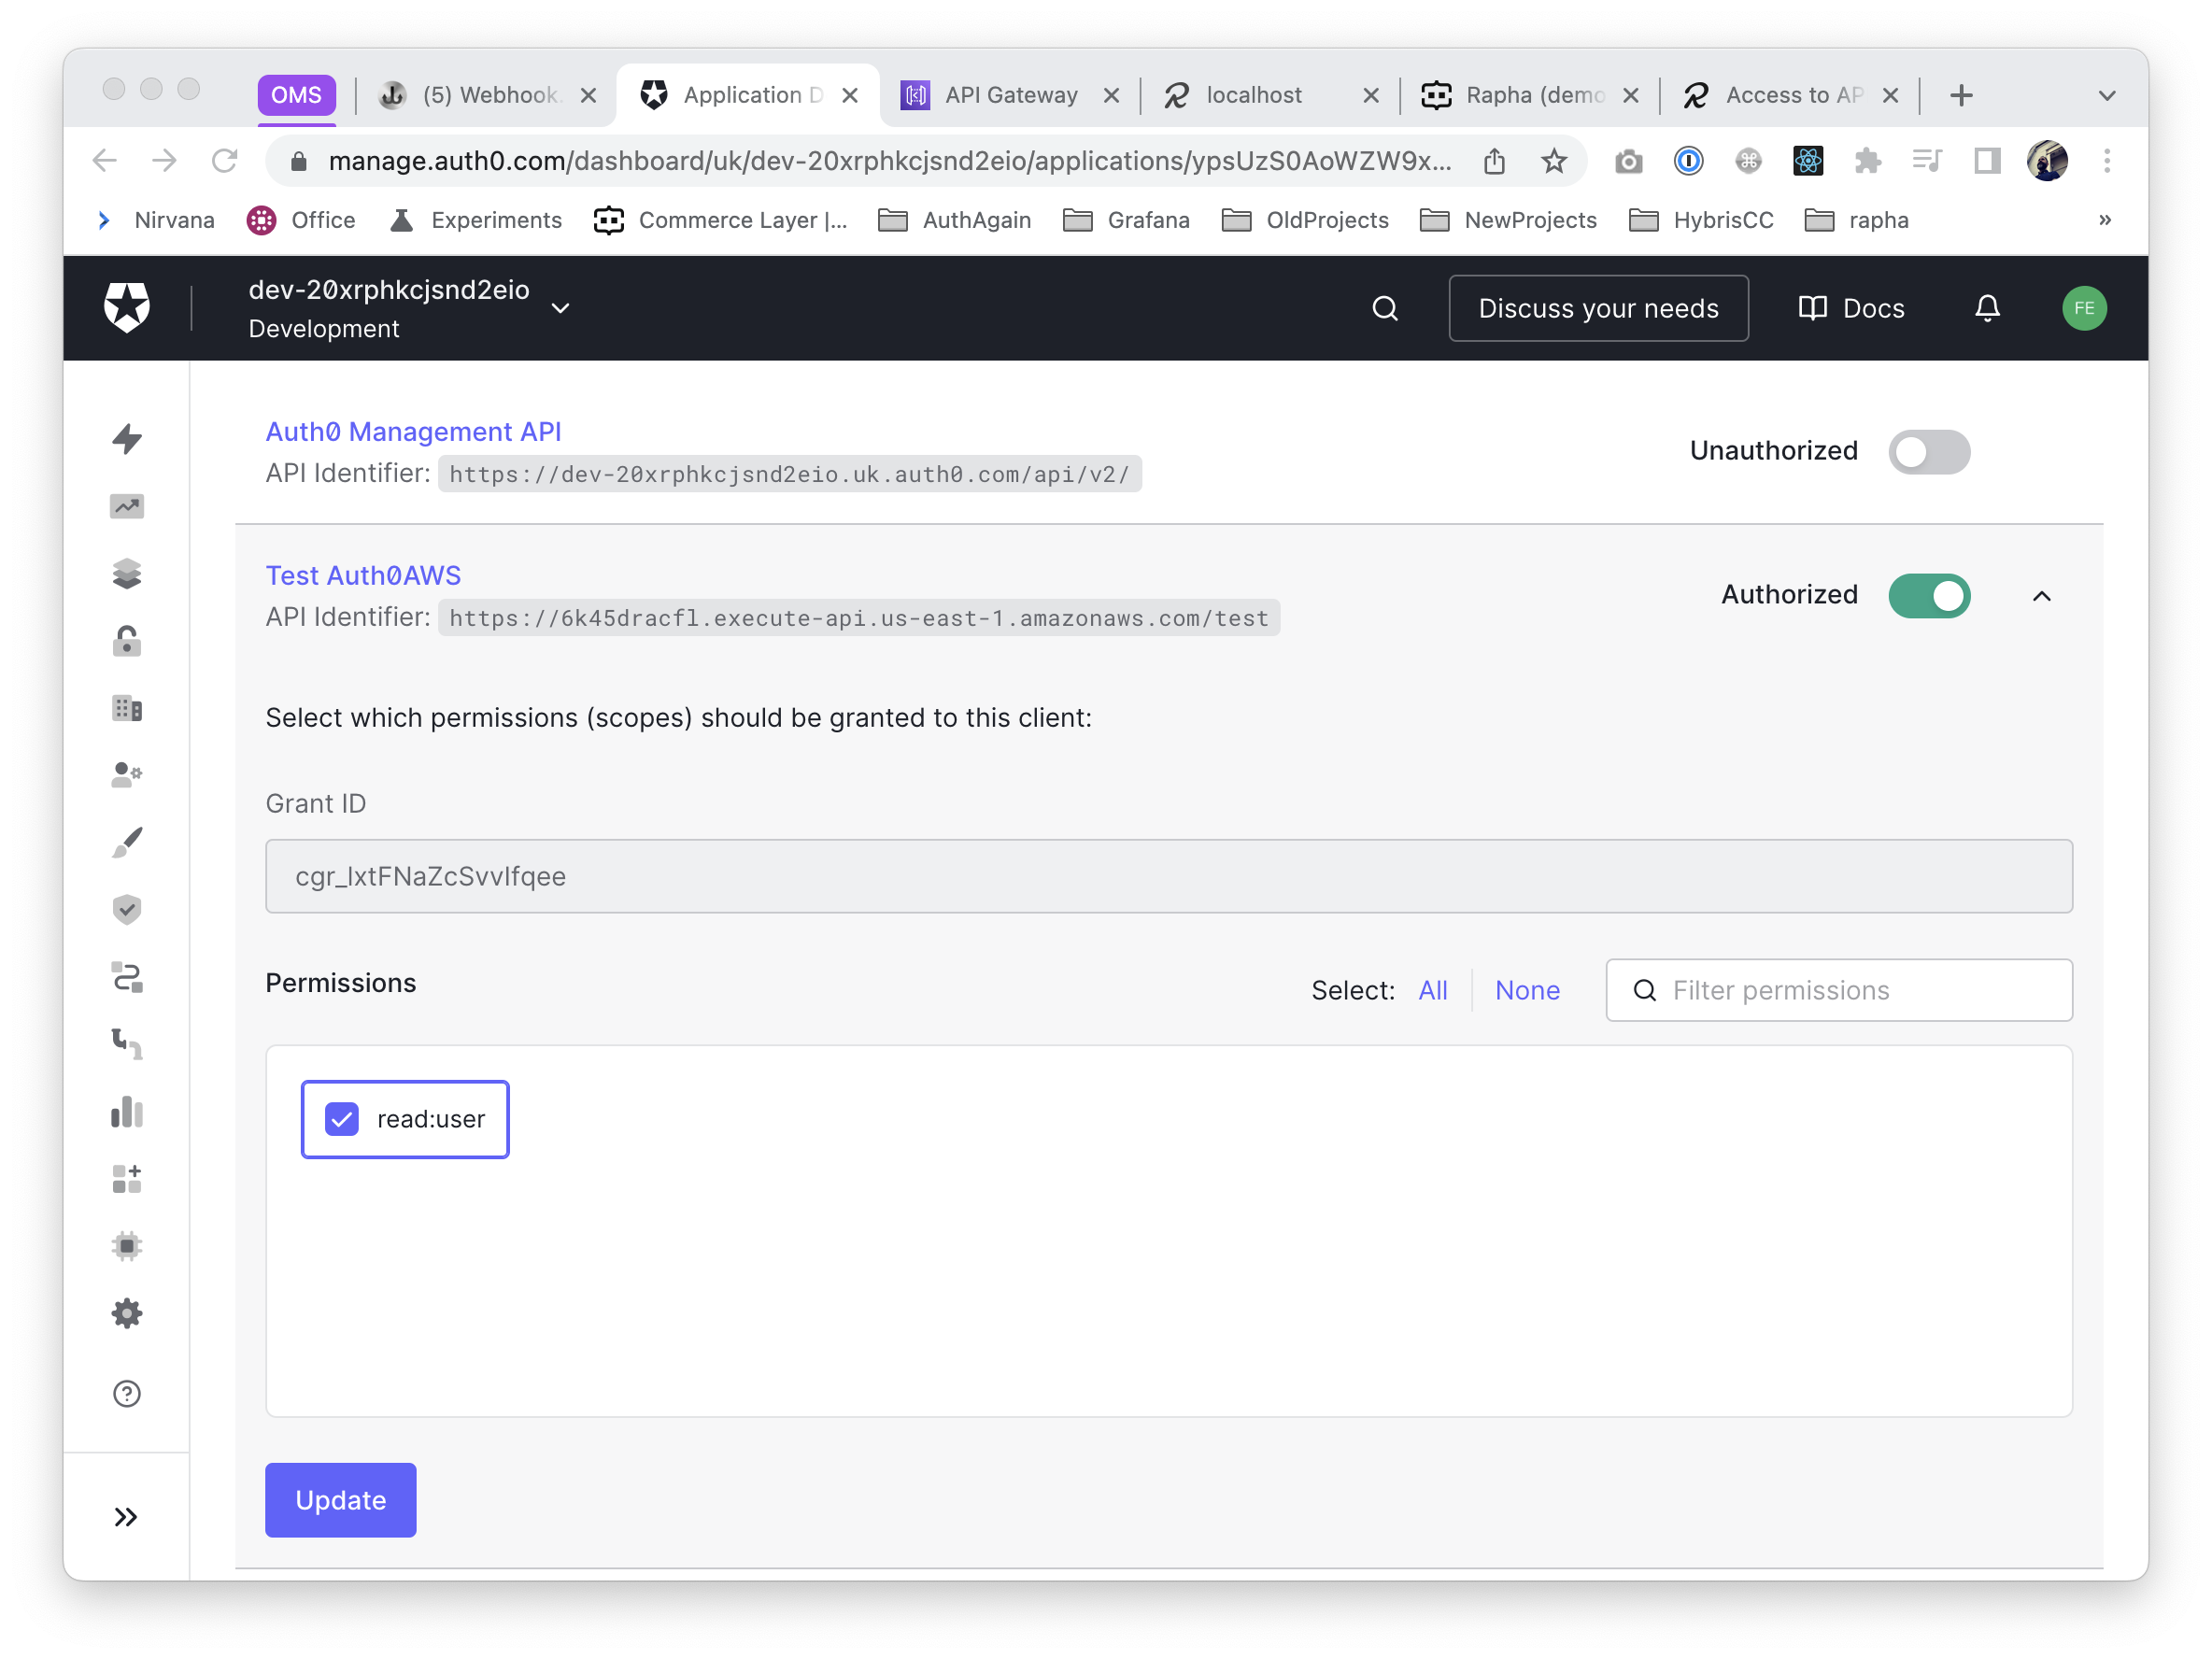
Define the permissions (based on scopes) the API will accept, for example, a read:user will do from now (we can define as many as required, like write:user, read:users, etc...)
Application
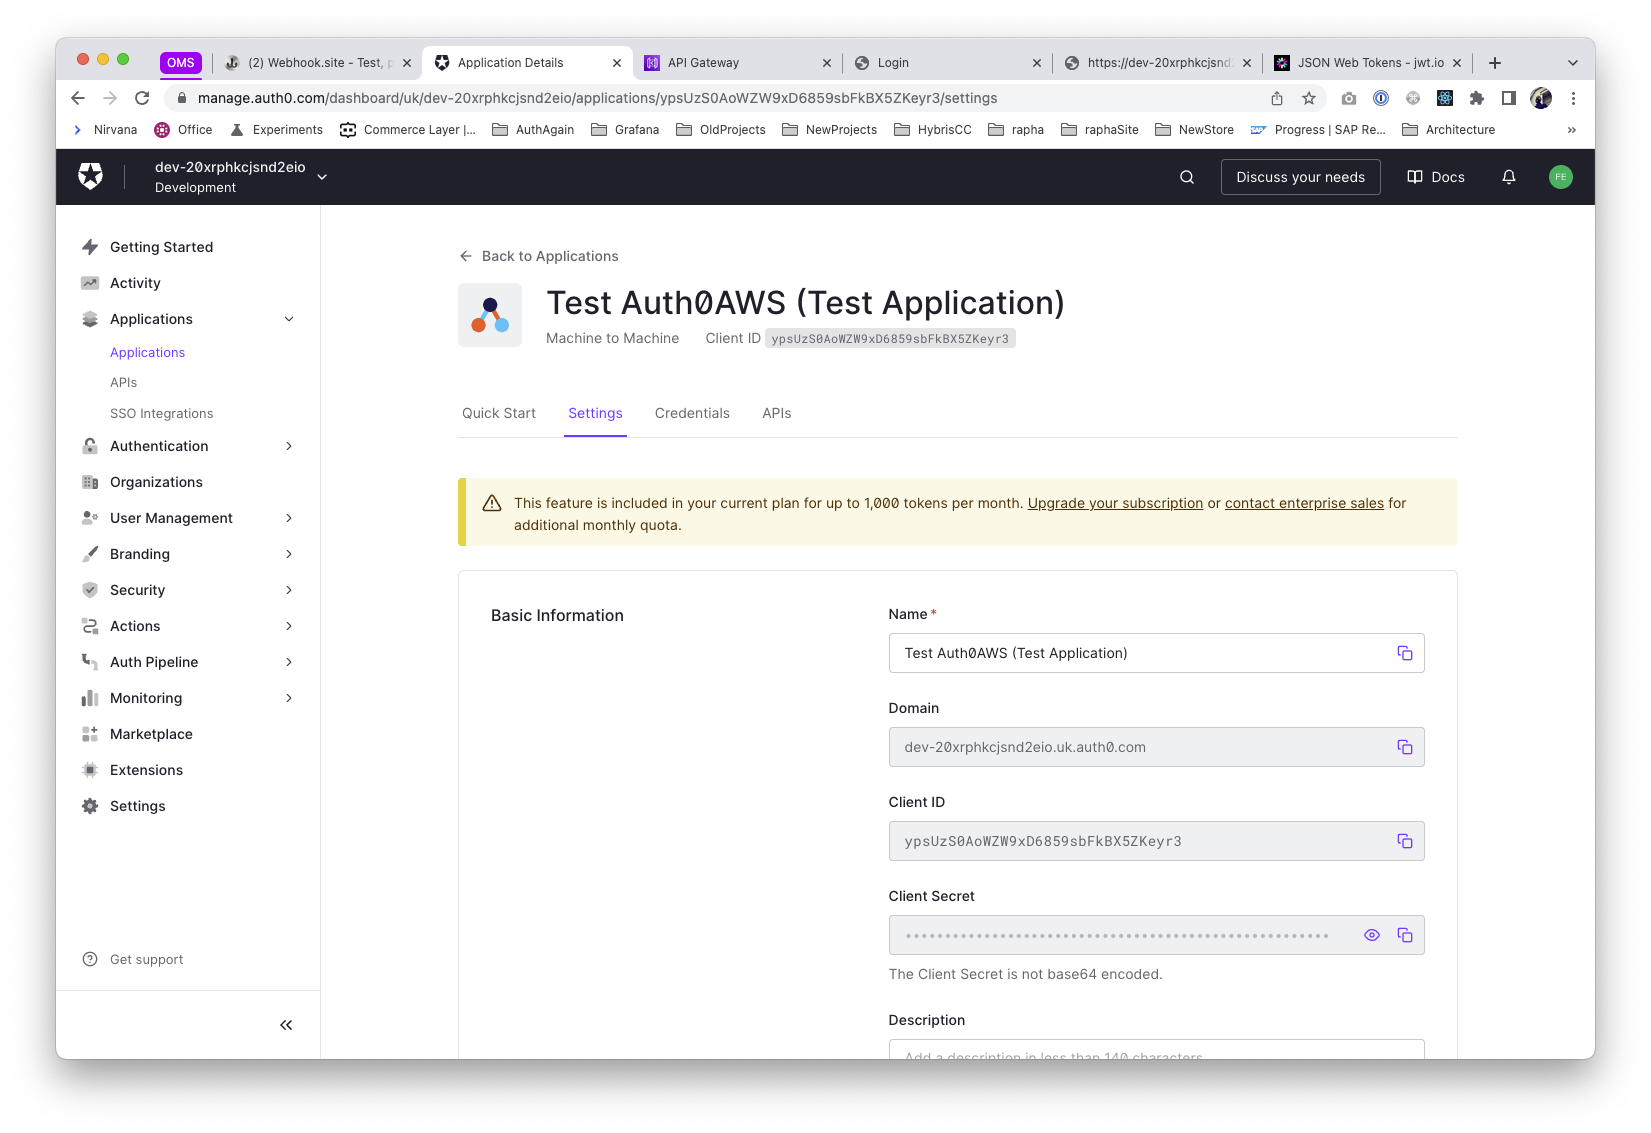
The flexibility of defining multiple applications in Auth0 is perfect for us, by giving us the approach of defining one application per vendor as default.
So, after creating a Machine to Machine application that has access to the Auth API, we get the crendentials client_id & client_secret
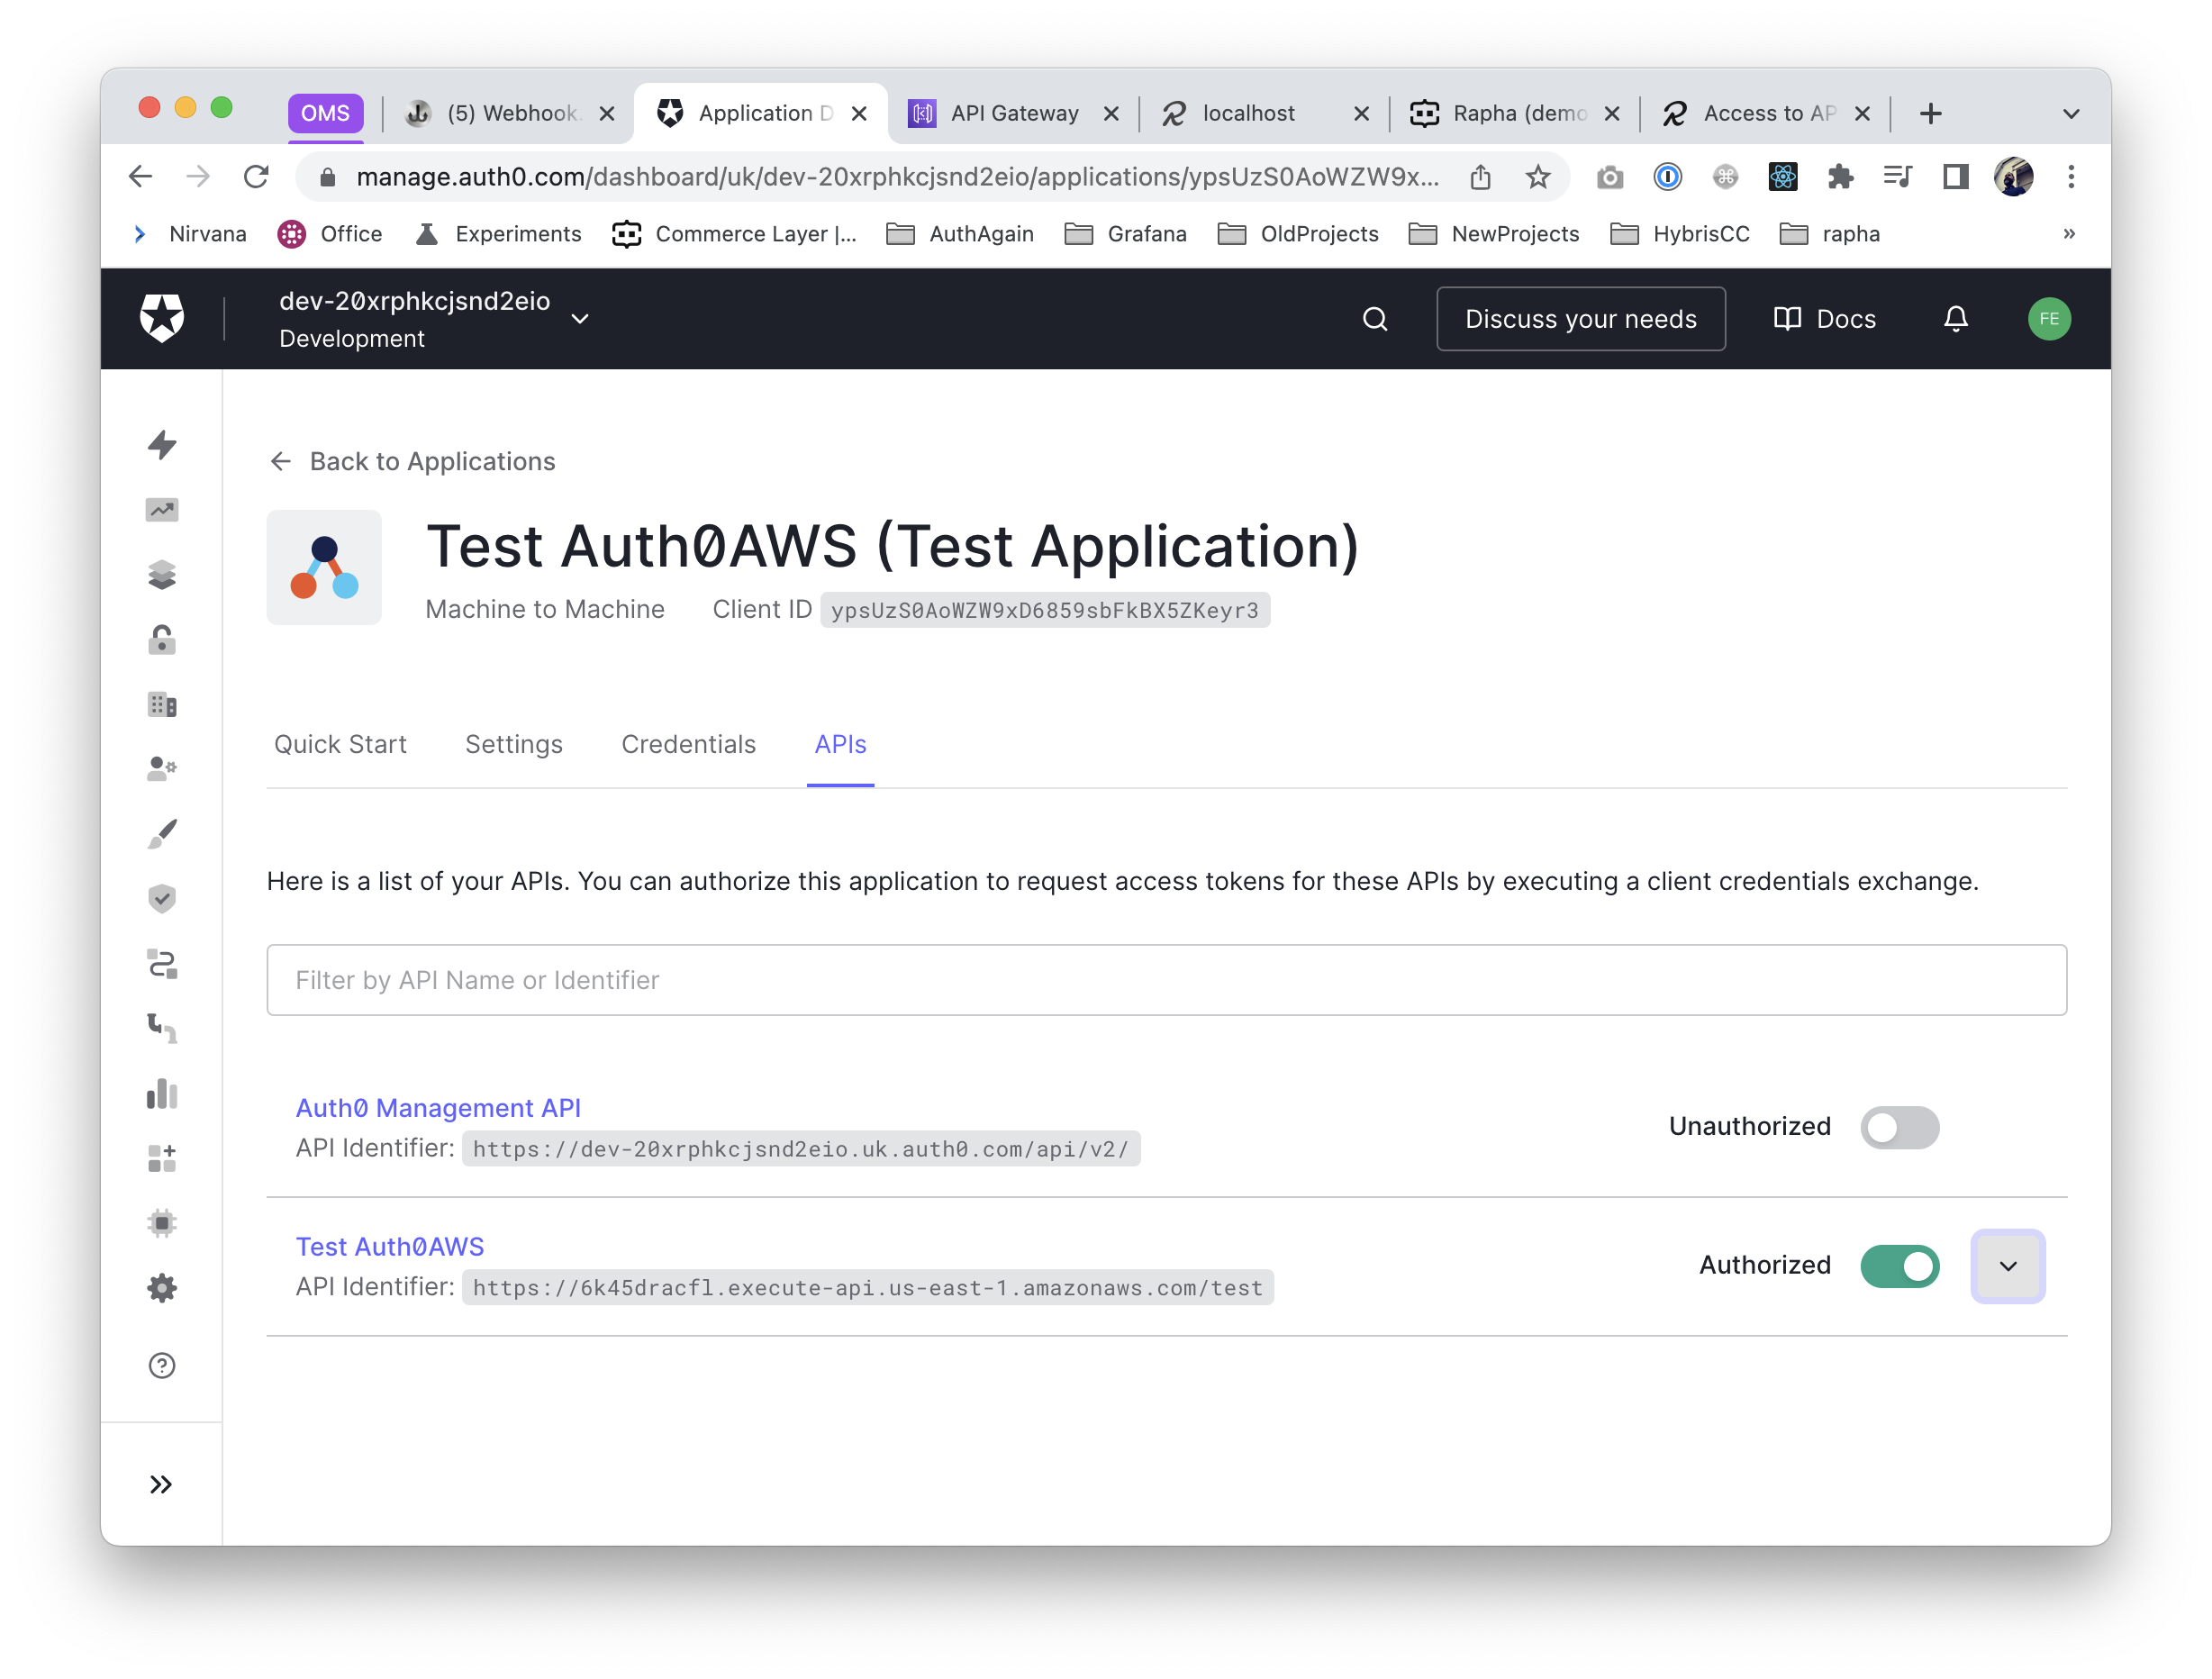
Is precisely at this step where we can define the scopes this application will get access to.
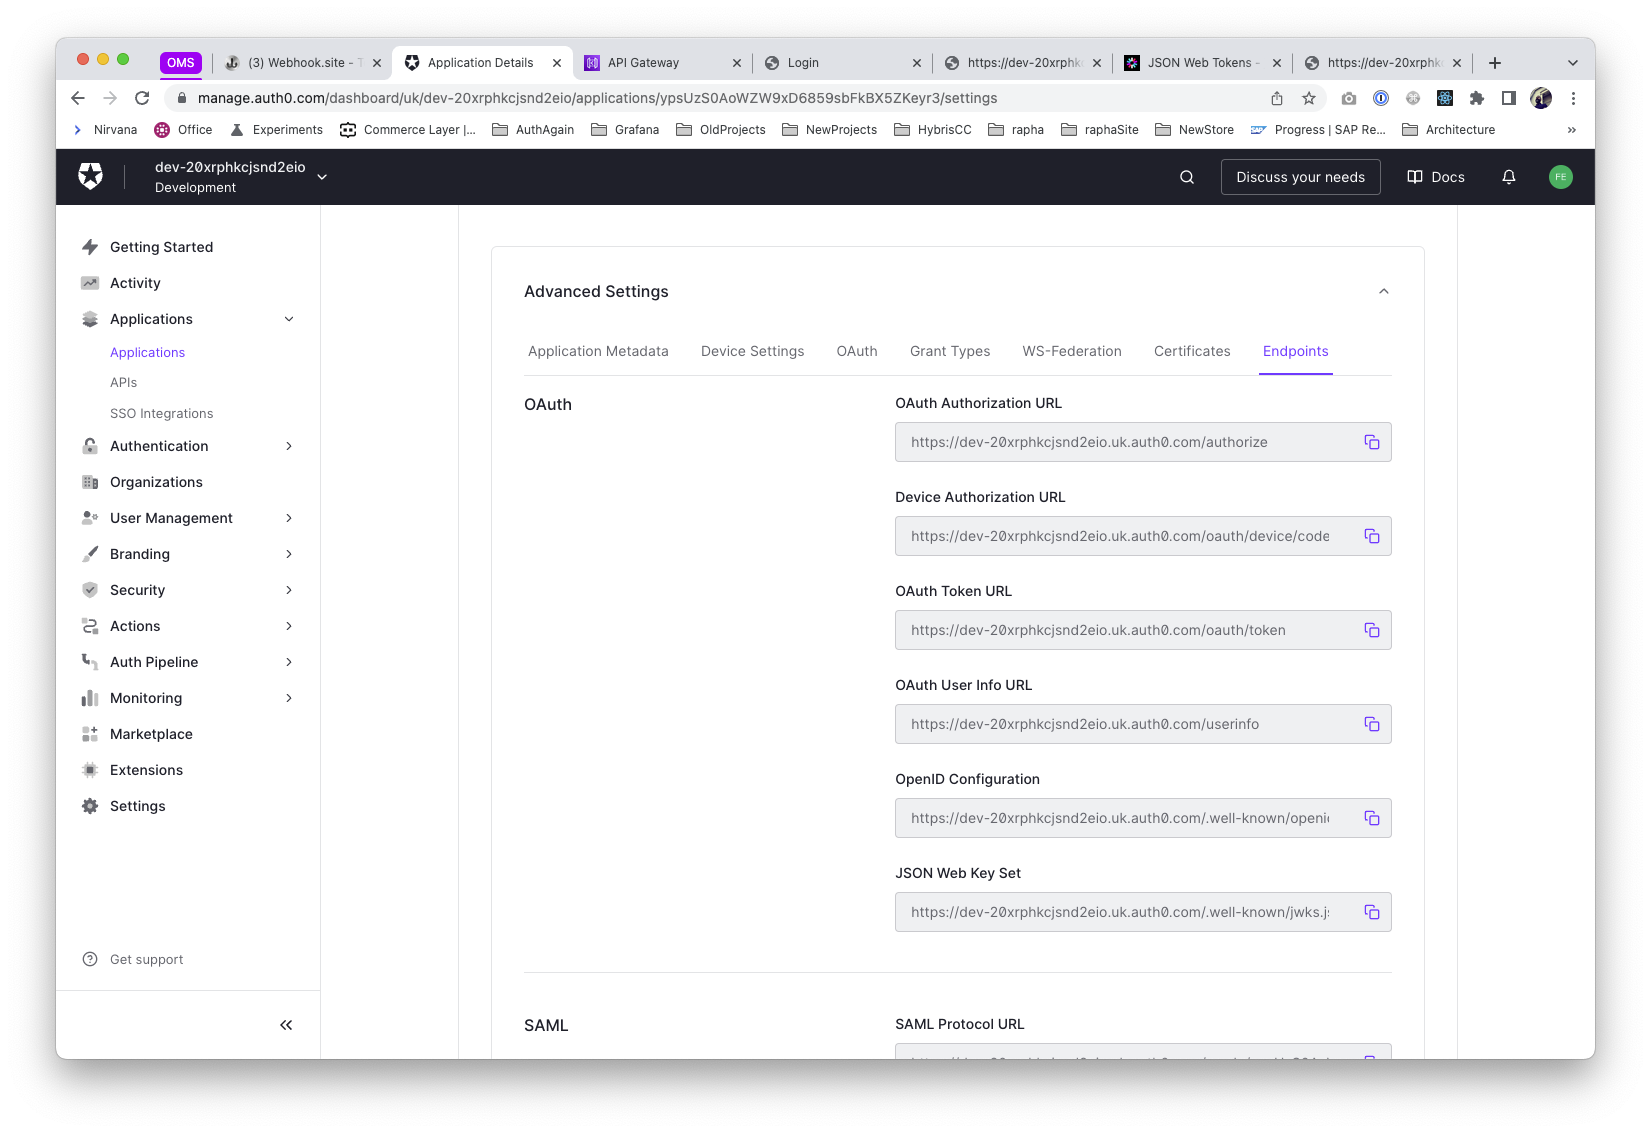
Last but not least, we'll retrieve the issuer for this application (the issuer will be the same for all the applications, since it refers to the Auth provider). We'll use this to add to the custom authoriser in our API, see below
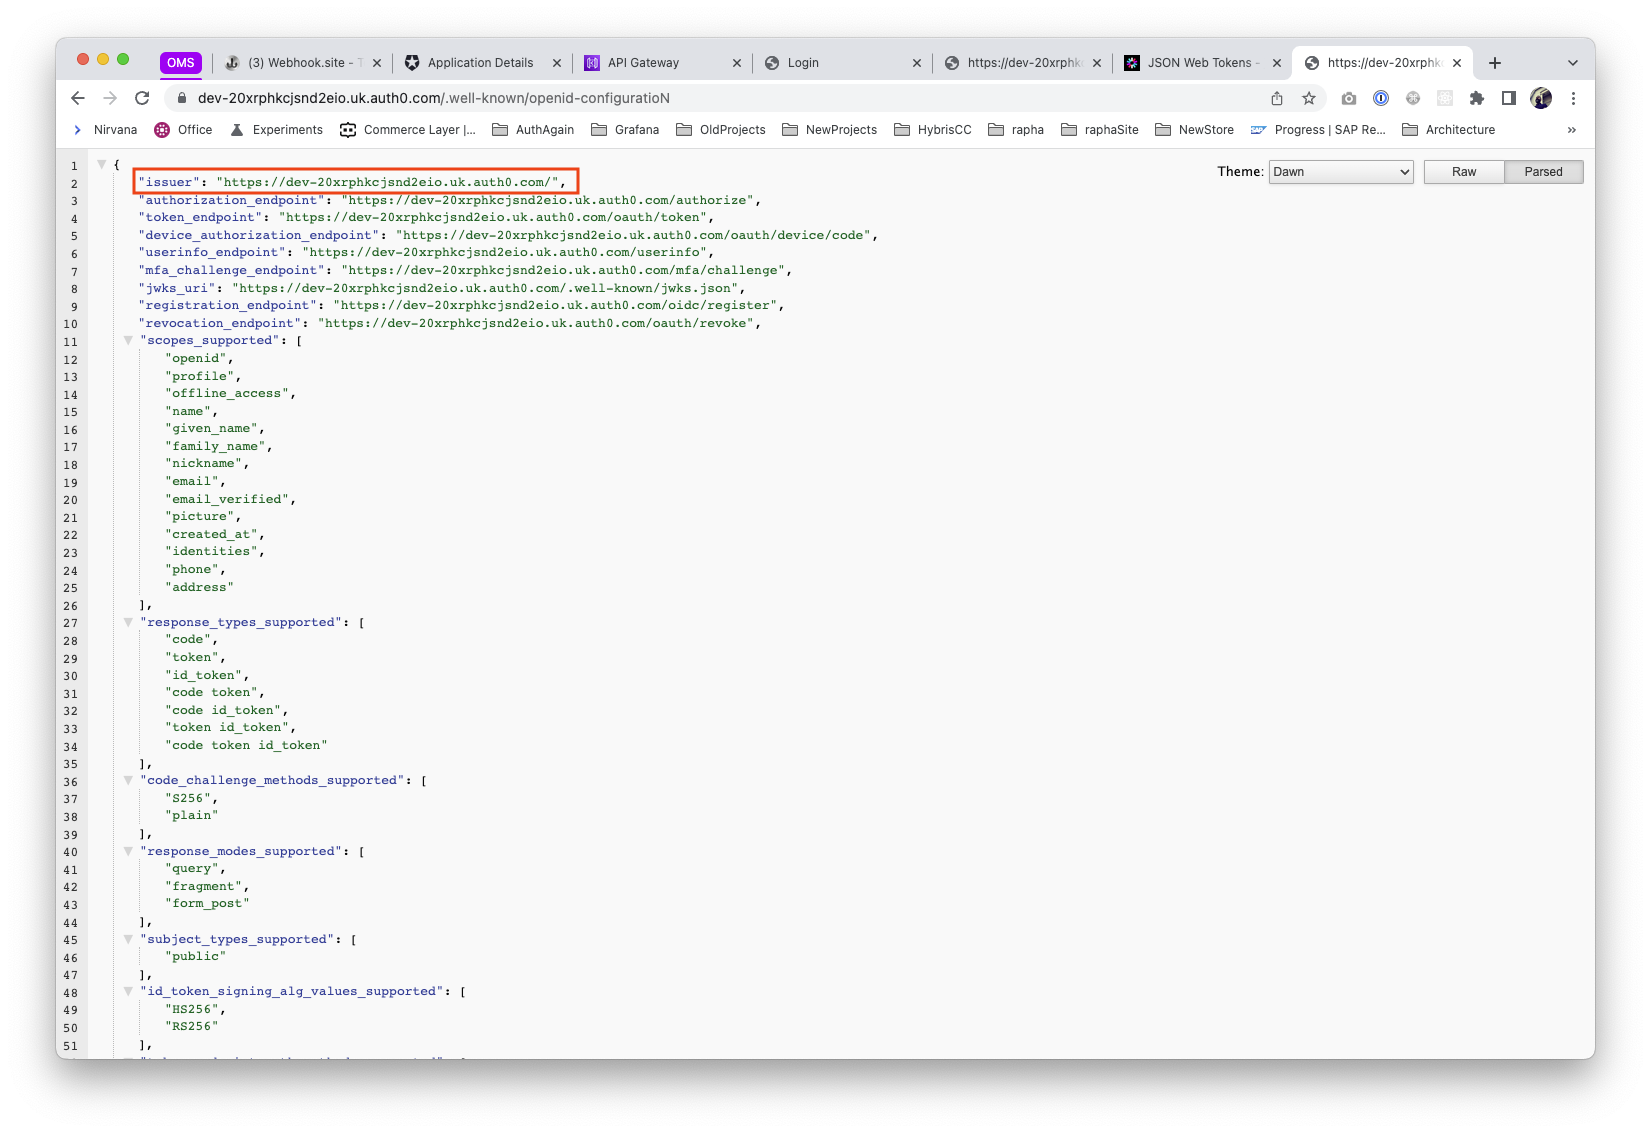
From the Application Settings, at the advance setting area (bottom of the page), copy the OpenID configuration
And open in a new tab, the issuer attribute will be in there.
Linking Auth & API Gateway
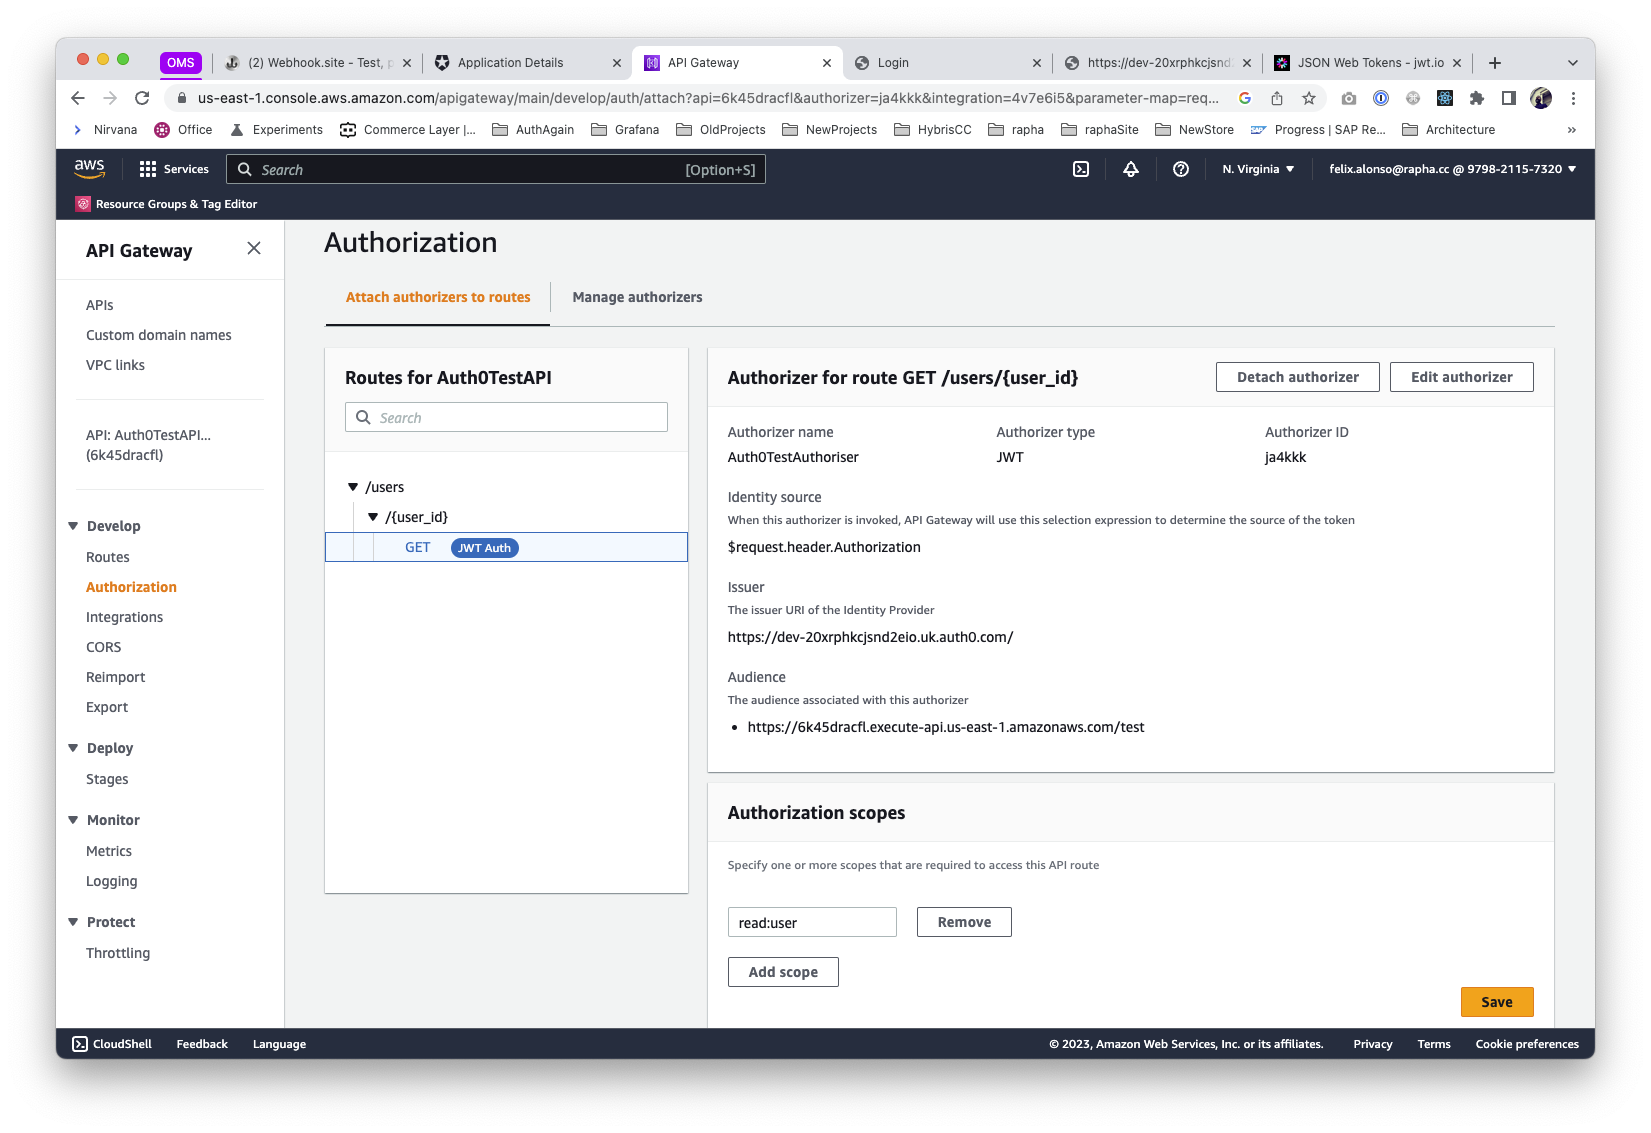
The final step is to configure an Authoriser in the AWS API Endpoint, where we specify the previous issuer and audience, being this last one the Identifier defined on the Auth API. We also add as many scopes as defined on it, in our case, we just did read:user
Quick testing
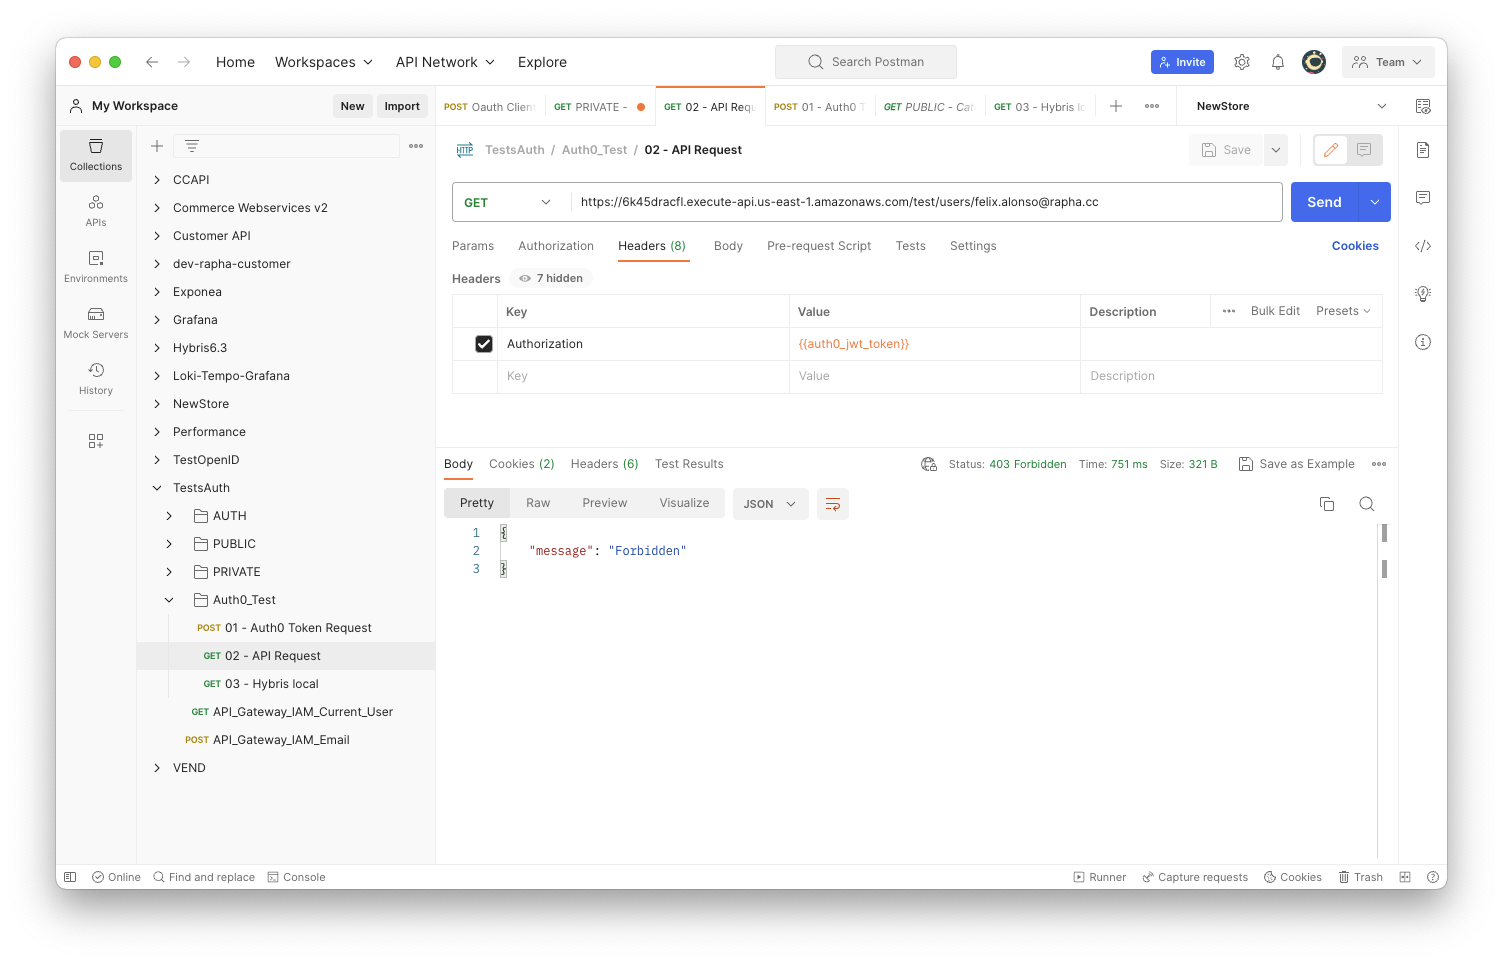
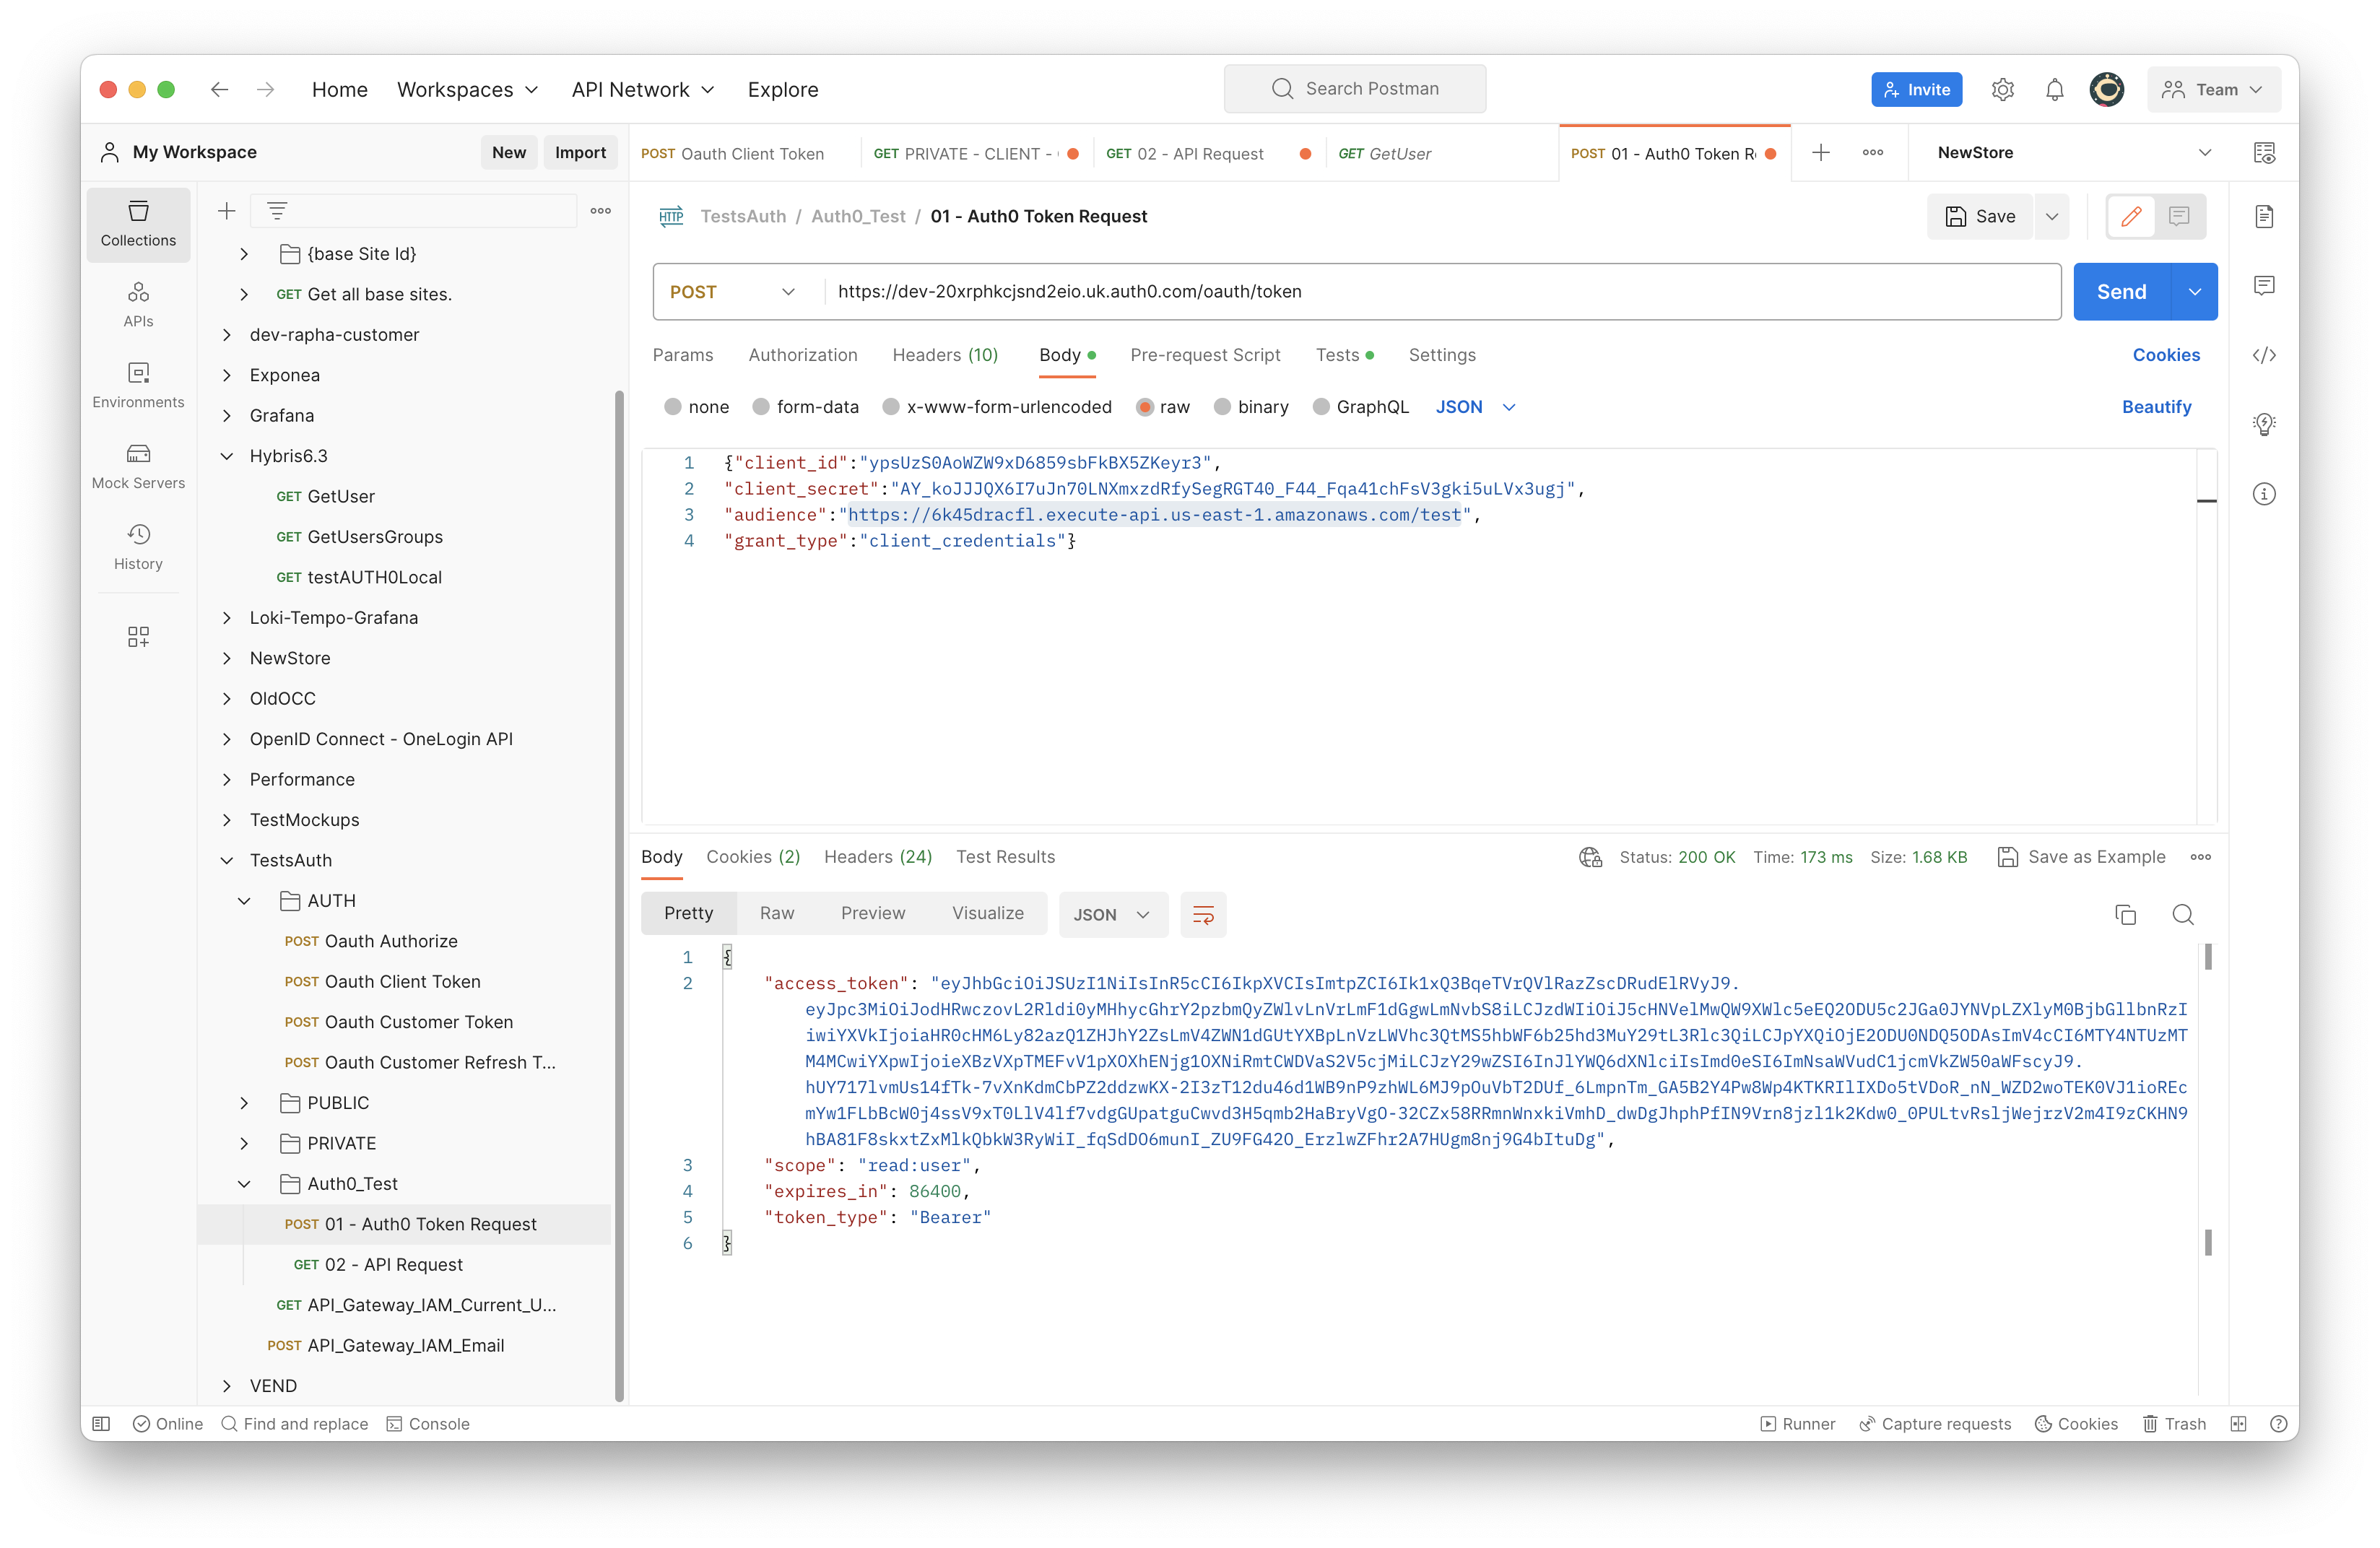
- Client Credential authentication request, in order to get the JWT access_token (expires)
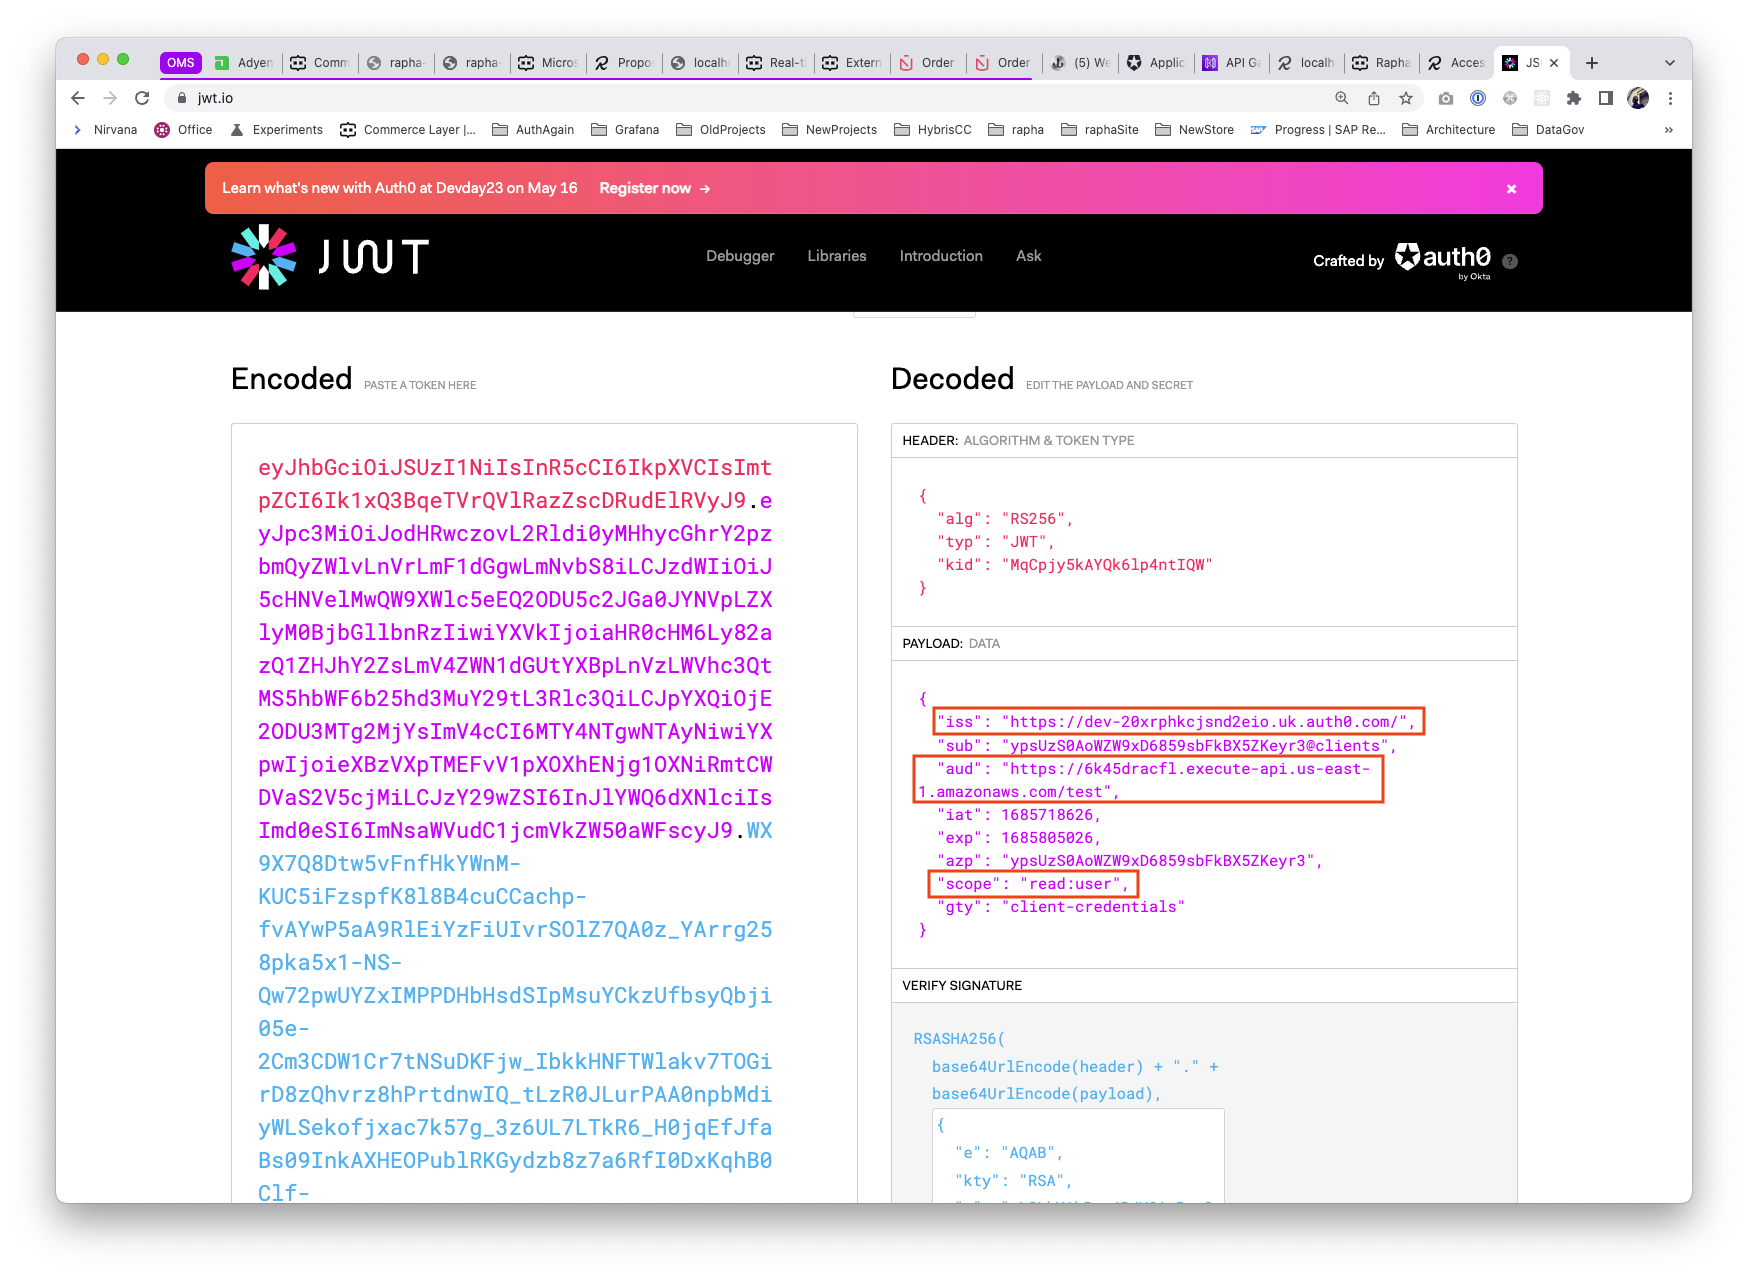
This can be decoded and review that the issuer, audience and scope are included as expected.
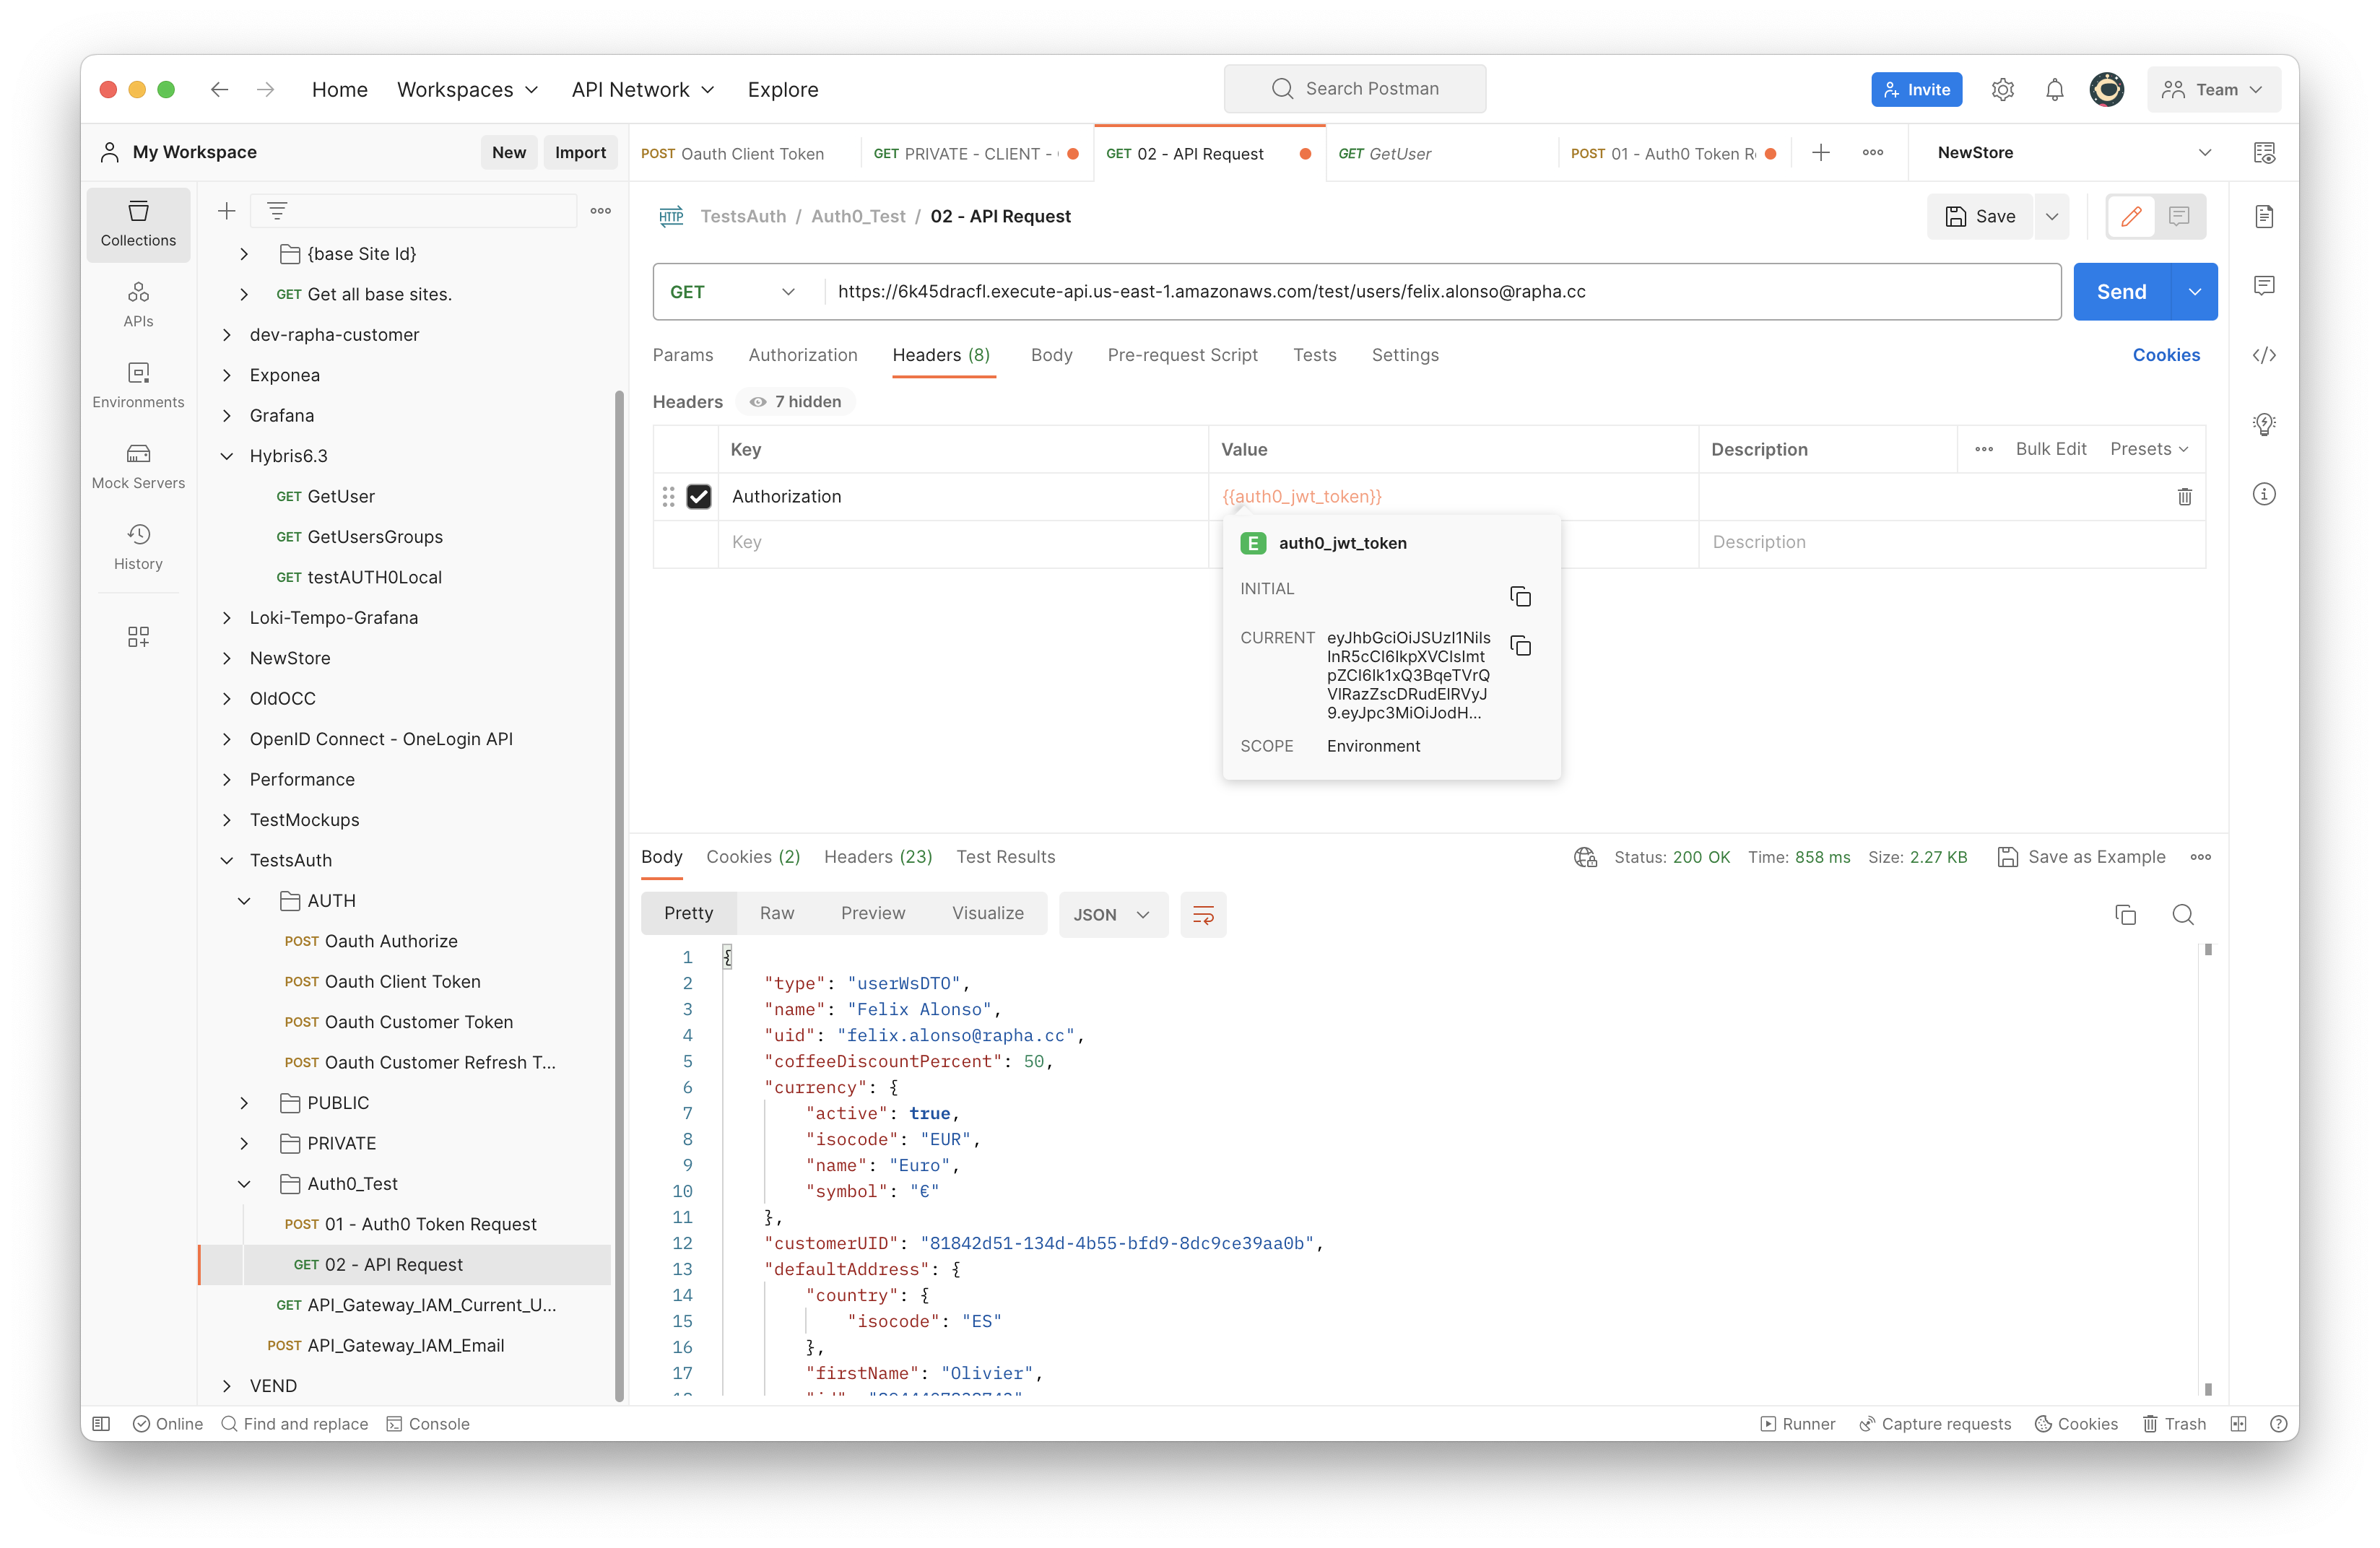
- AWS API call including the token as a Authorization header
A quick removal of the read:user on the scope of the Auth Application, and after a new access_token request, the request to the API endpoint will be unauthorised.